For the past few weeks, I’ve been looking for the right tools to develop REST APIs quickly and deploy them with minimal effort. That’s when I came across Hono. At first, I didn’t think much of it, but after giving it a try, I loved how similar it is to Express. It felt familiar and easy to work with.
However, I soon realized that Hono isn’t designed for traditional Node.js projects. It’s built specifically for Cloudflare Workers. That got me thinking: what exactly are Cloudflare Workers? I decided to explore the platform to understand how it works and see if it was the right fit for my needs.
Cloudflare Workers surprised me, in a good way. It was so easy to set up and use that I decided to push myself further by experimenting with Drizzle ORM, one of my many pending To-Do’s. I briefly encountered Drizzle before when setting up an AI Chatbot with a Vercel template, but this time, I wanted to dig in and try it from scratch.
The result? A combination of:
- Hono — a lightweight web application framework.
- Drizzle — a TypeScript ORM.
- Cloudflare Workers — a platform for serverless code deployment.
- Neon — a serverless platform for creating and managing Postgres databases.
Here’s what I learned and how everything came together.
1. Setup
1.1. Project creation
To start creating our API and quickly test it in the cloud, we’ll need to run just a few commands.

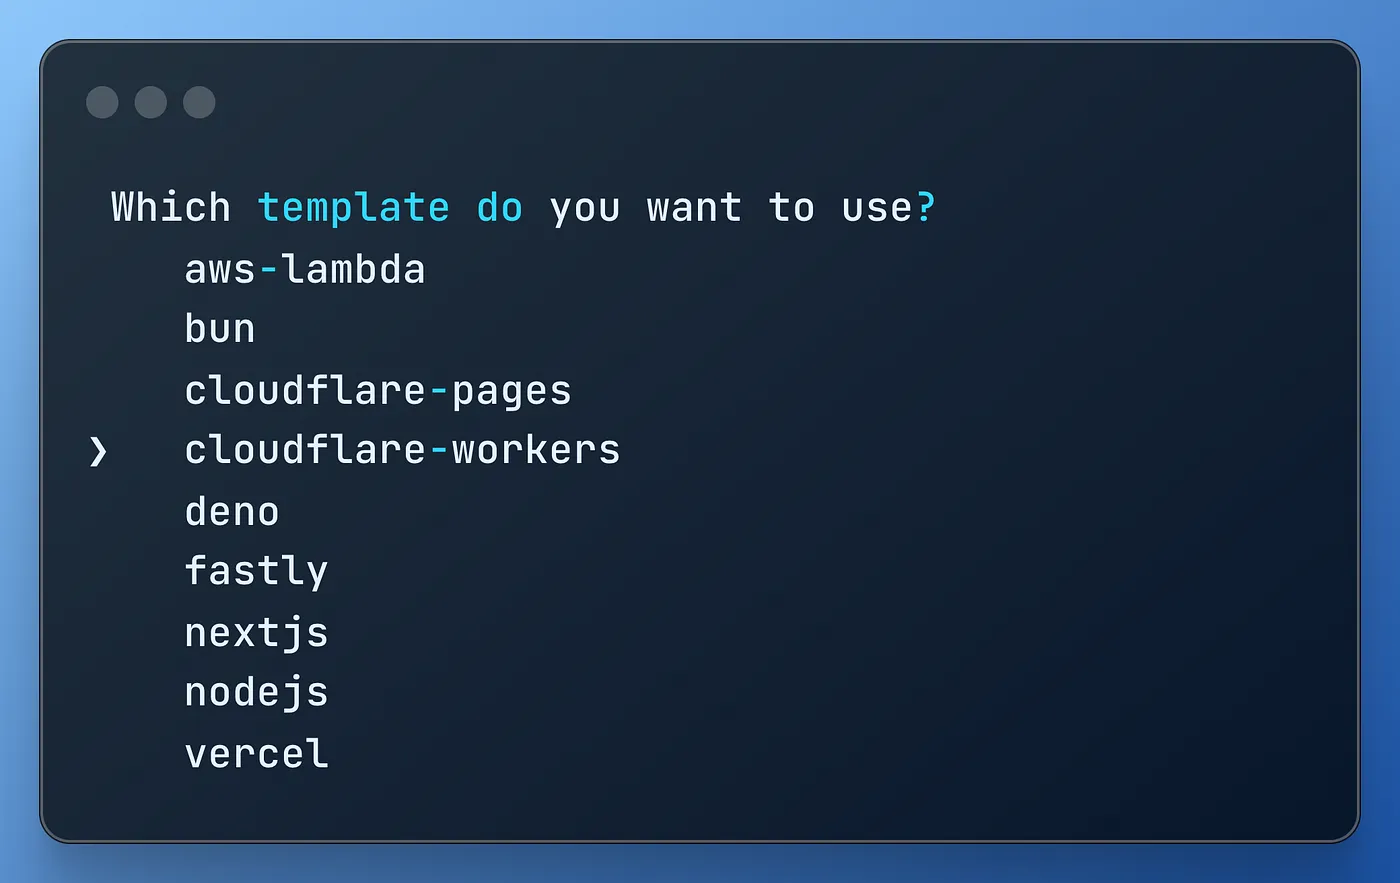
Once it’s running, remember to select the correct template (cloudflare-workers) for the proper setup that will help us do an easy setup and fast deployment.
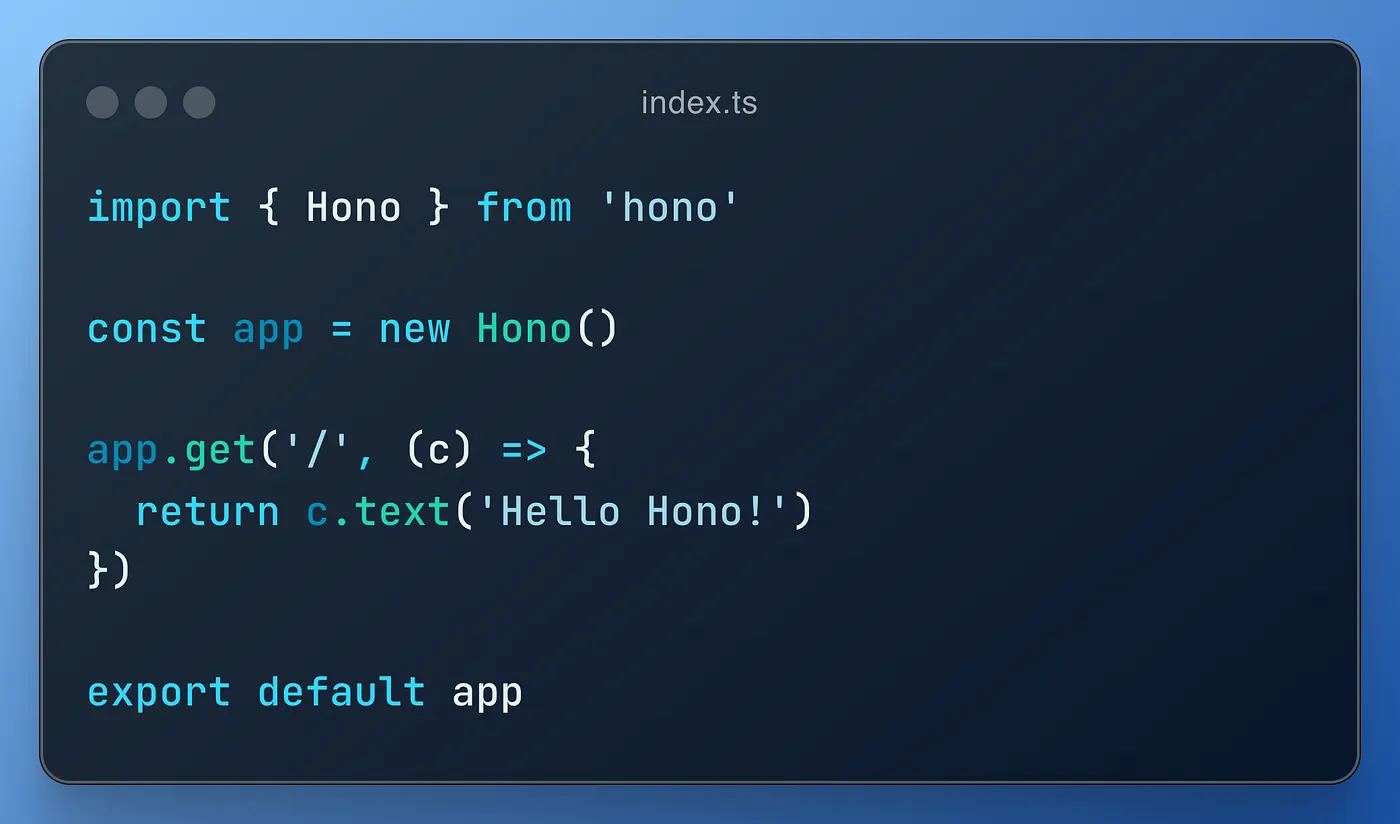
We’ll get an app with many files, including an index with a classical “hello world” written in Hono, something very similar to Express.
We’re just a few steps from deploying our app. Can you believe it?

This will open a new tab for us to sign up. Fill out the form, or use your preferred single sign on method.
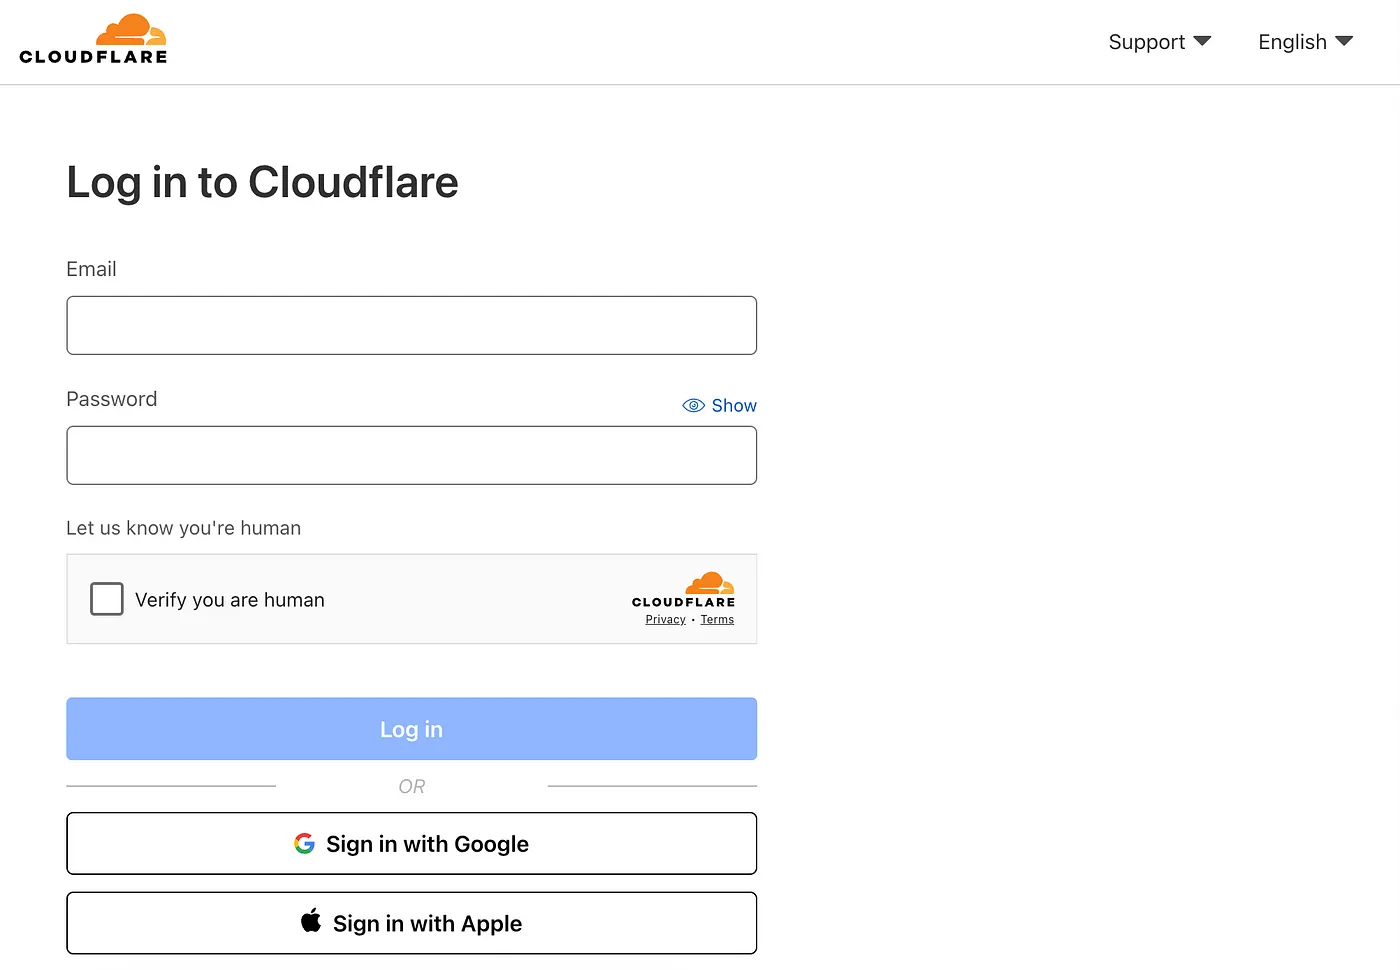
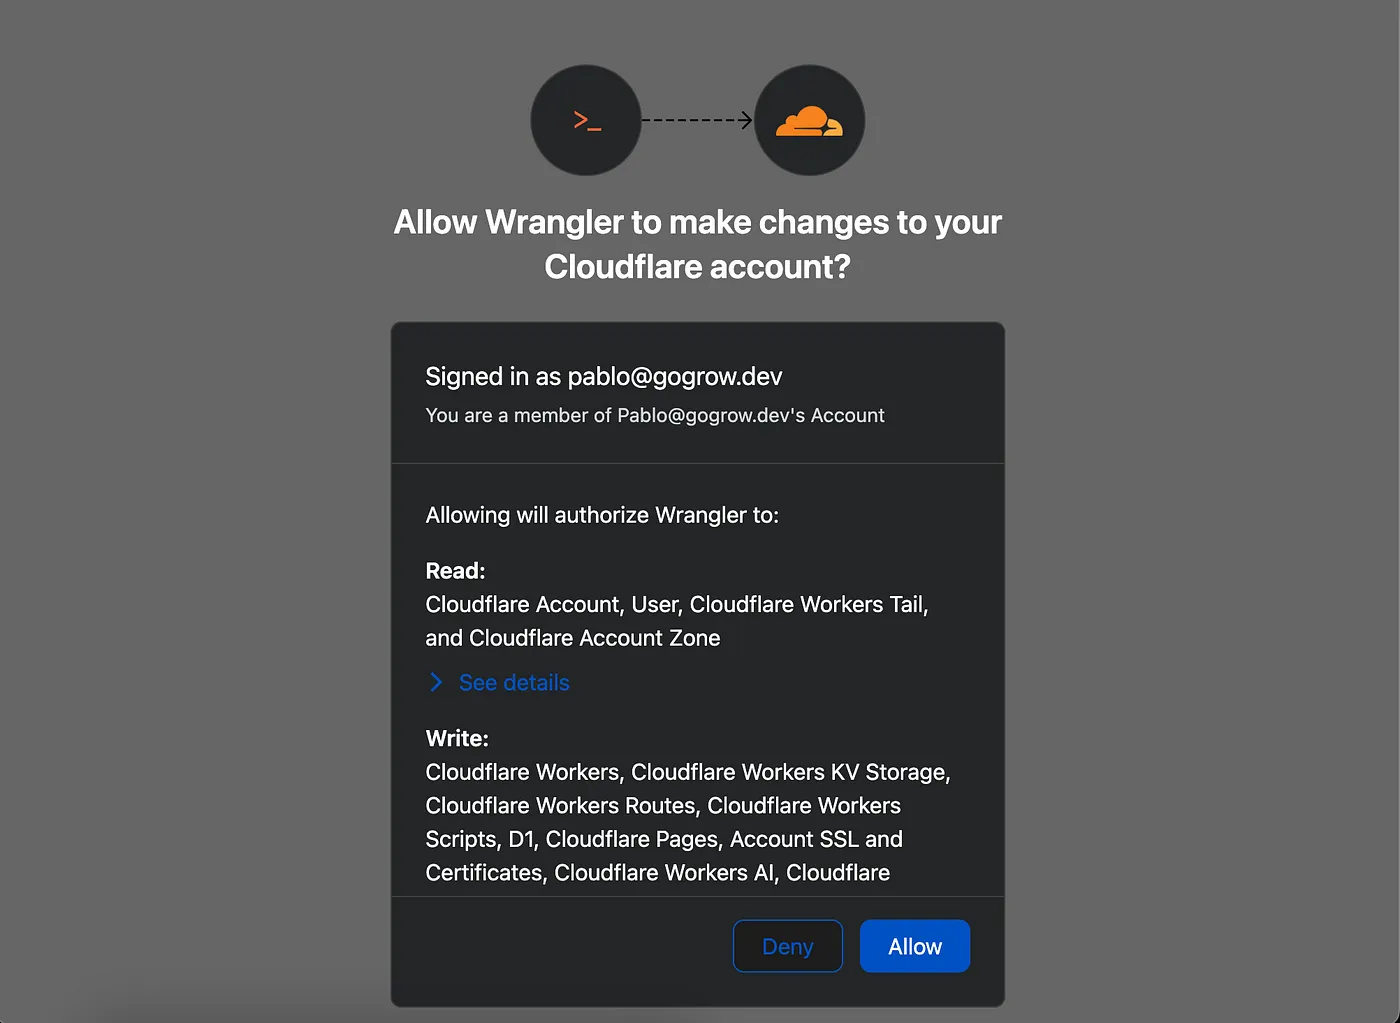
The sign up process is a bit slow; always wait for the dashboard to fully load. After that, do a quick setup, just stop the running process in your terminal, and run npm run deploy again. This will open the following authorization form to create the Cloudflare Worker for us, so you just need to click "Allow".
You’ll get a successfully logged-in message in your terminal once the process is finished. You’ll be asked to share usage metrics or not, which you can decide by pressing Y or N.
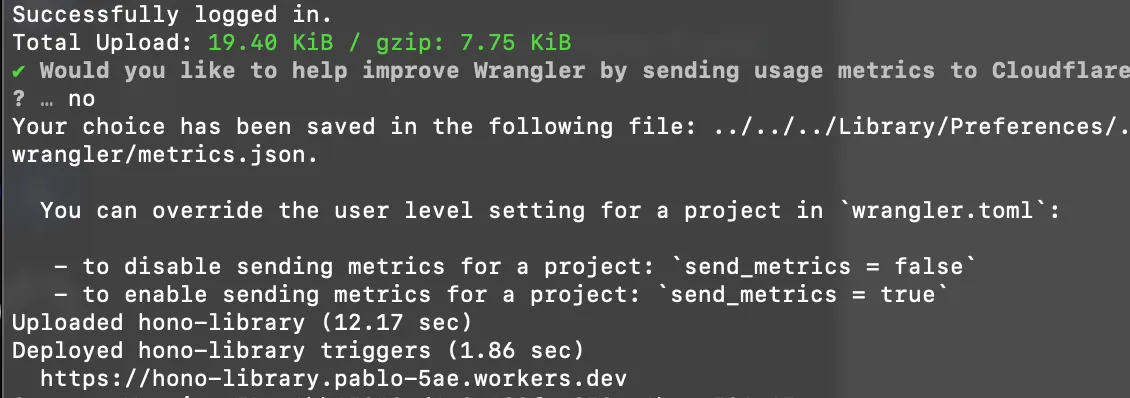
But this is pretty much what we need.
1.2. Quick connection test
Check the previous image; we have an interesting URL there that is ready to be hit. If you’re not patient enough, you might get this error message.
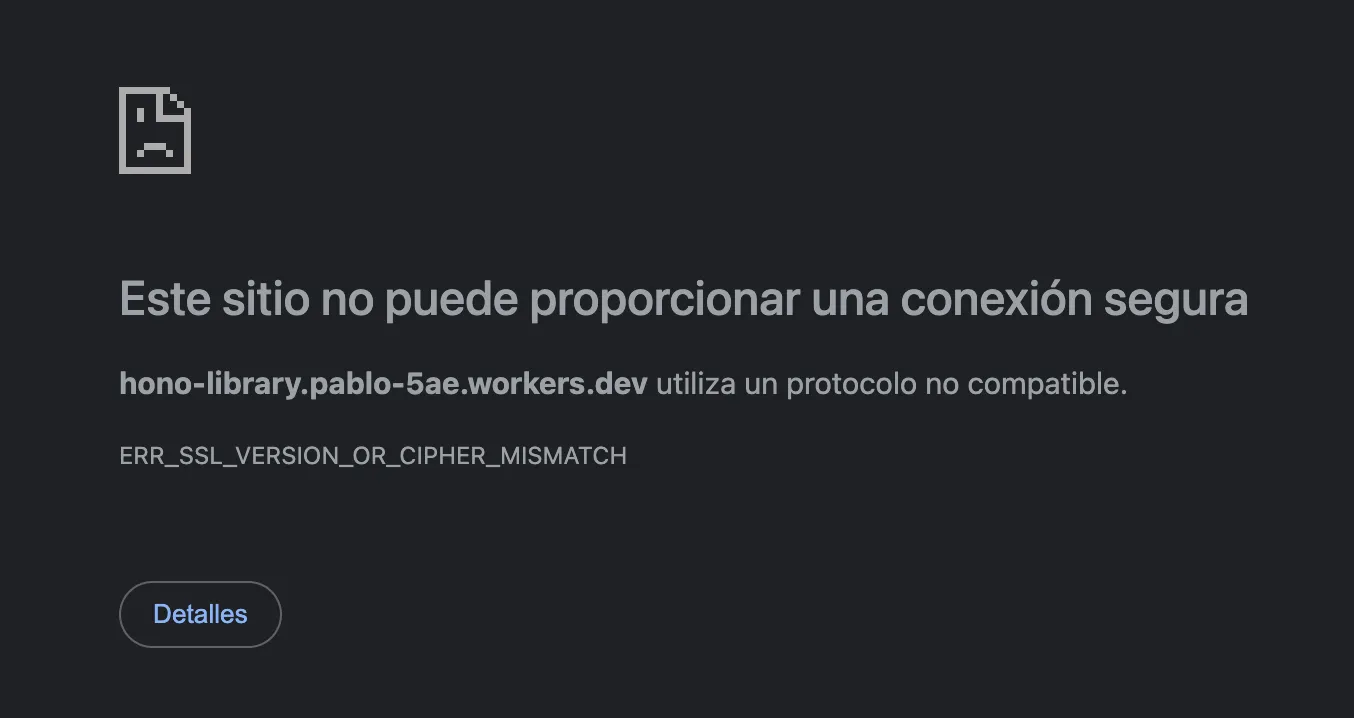
This is because our SSL certificates are not ready. But we can still give it a try using HTTP, right? What do you think it is? Maybe it’s an administration panel for our brand-new API. Modern browsers might not allow us to do a plain HTTP request easily, so we can try with Postman or Insomnia to at least check what’s going on.
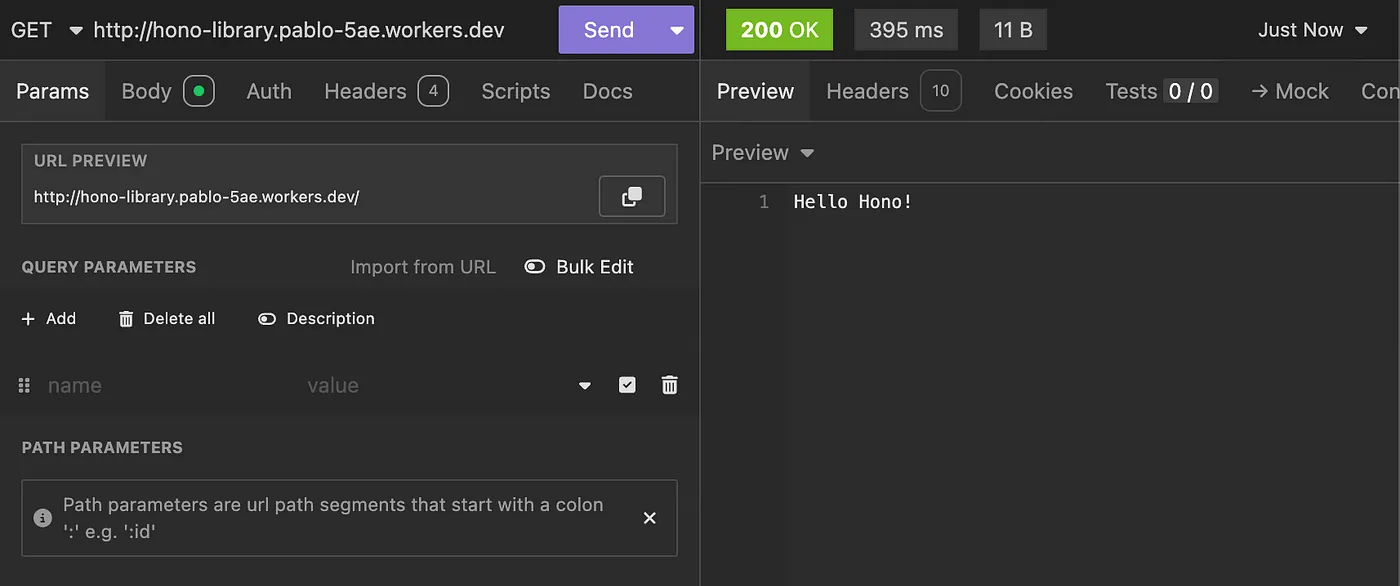
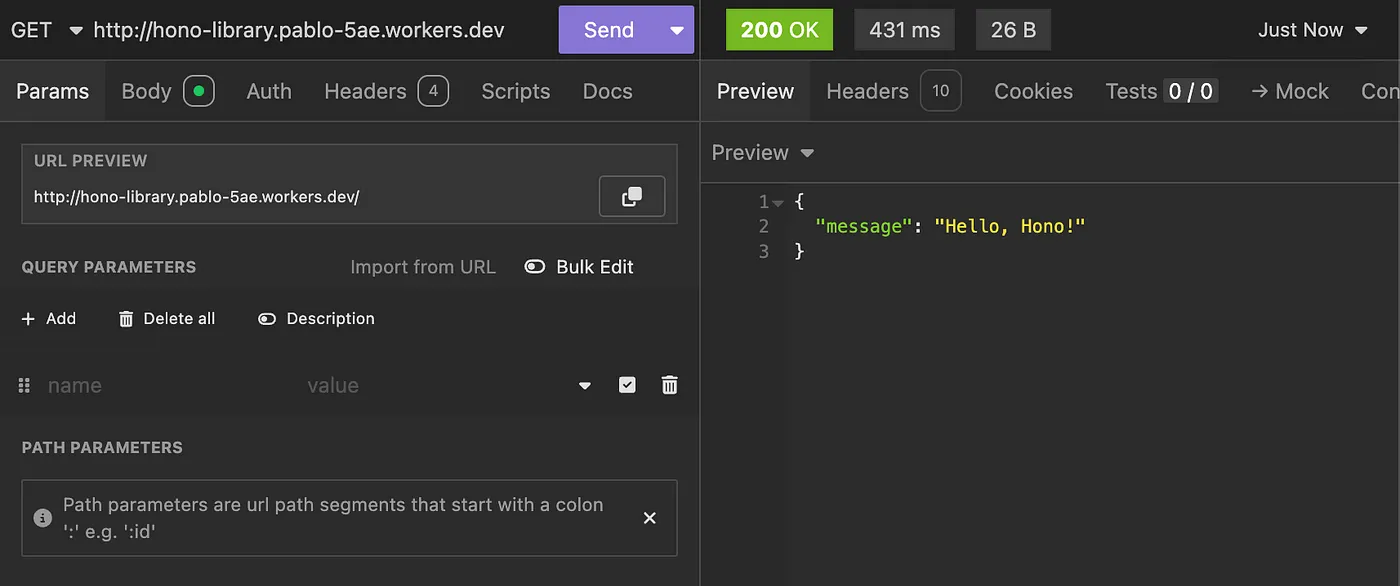
Remember that line? It’s our API running live using Cloudflare Workers. In case you’re skeptical of how easy all of this was, let’s make a small change to our index, making our function return a JSON object instead of plain text using the json function provided by the context object (c):
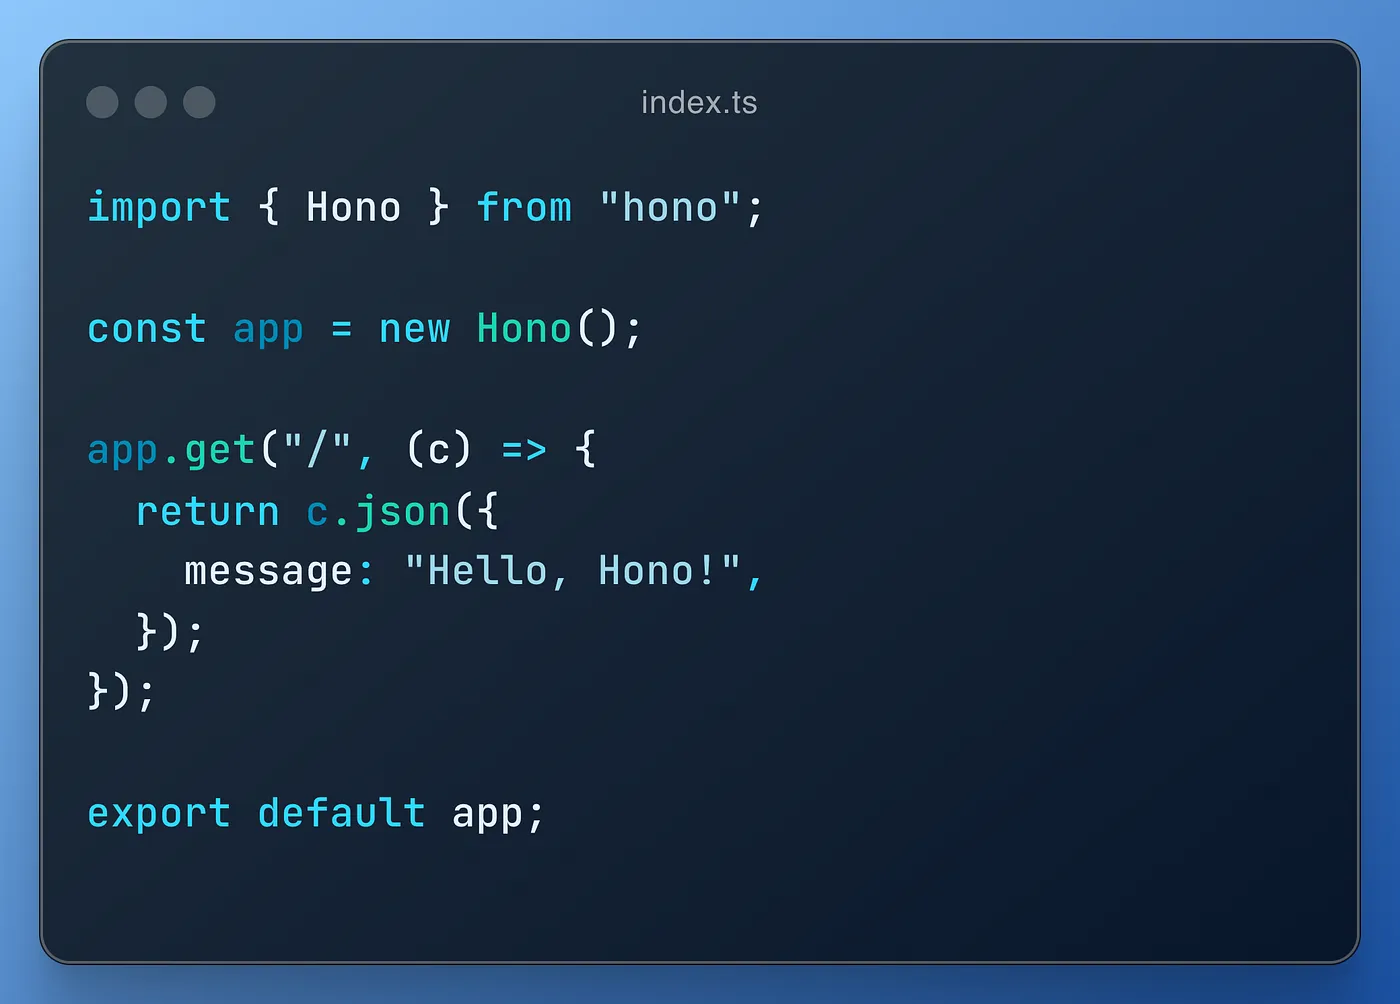
Save and run npm run deploy in your terminal to see our changes live. Yes, it's that easy! And it took me only three seconds to deploy.
2. Starting with Neon
To start working with your databases, we first need to have one configured. Neon is a serverless provider that will be a great place to start. Go to https://neon.tech and sign-up using your preferred method. A project setup form will appear; fill it the following way:
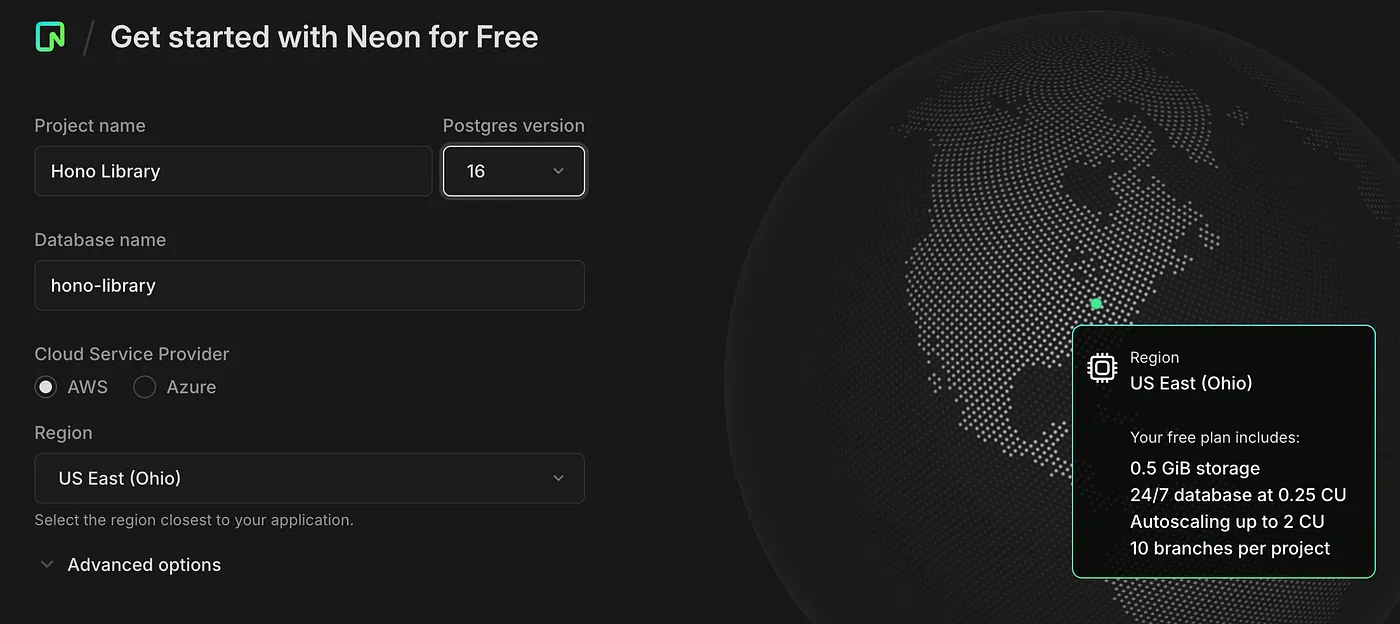
Click on Confirm.
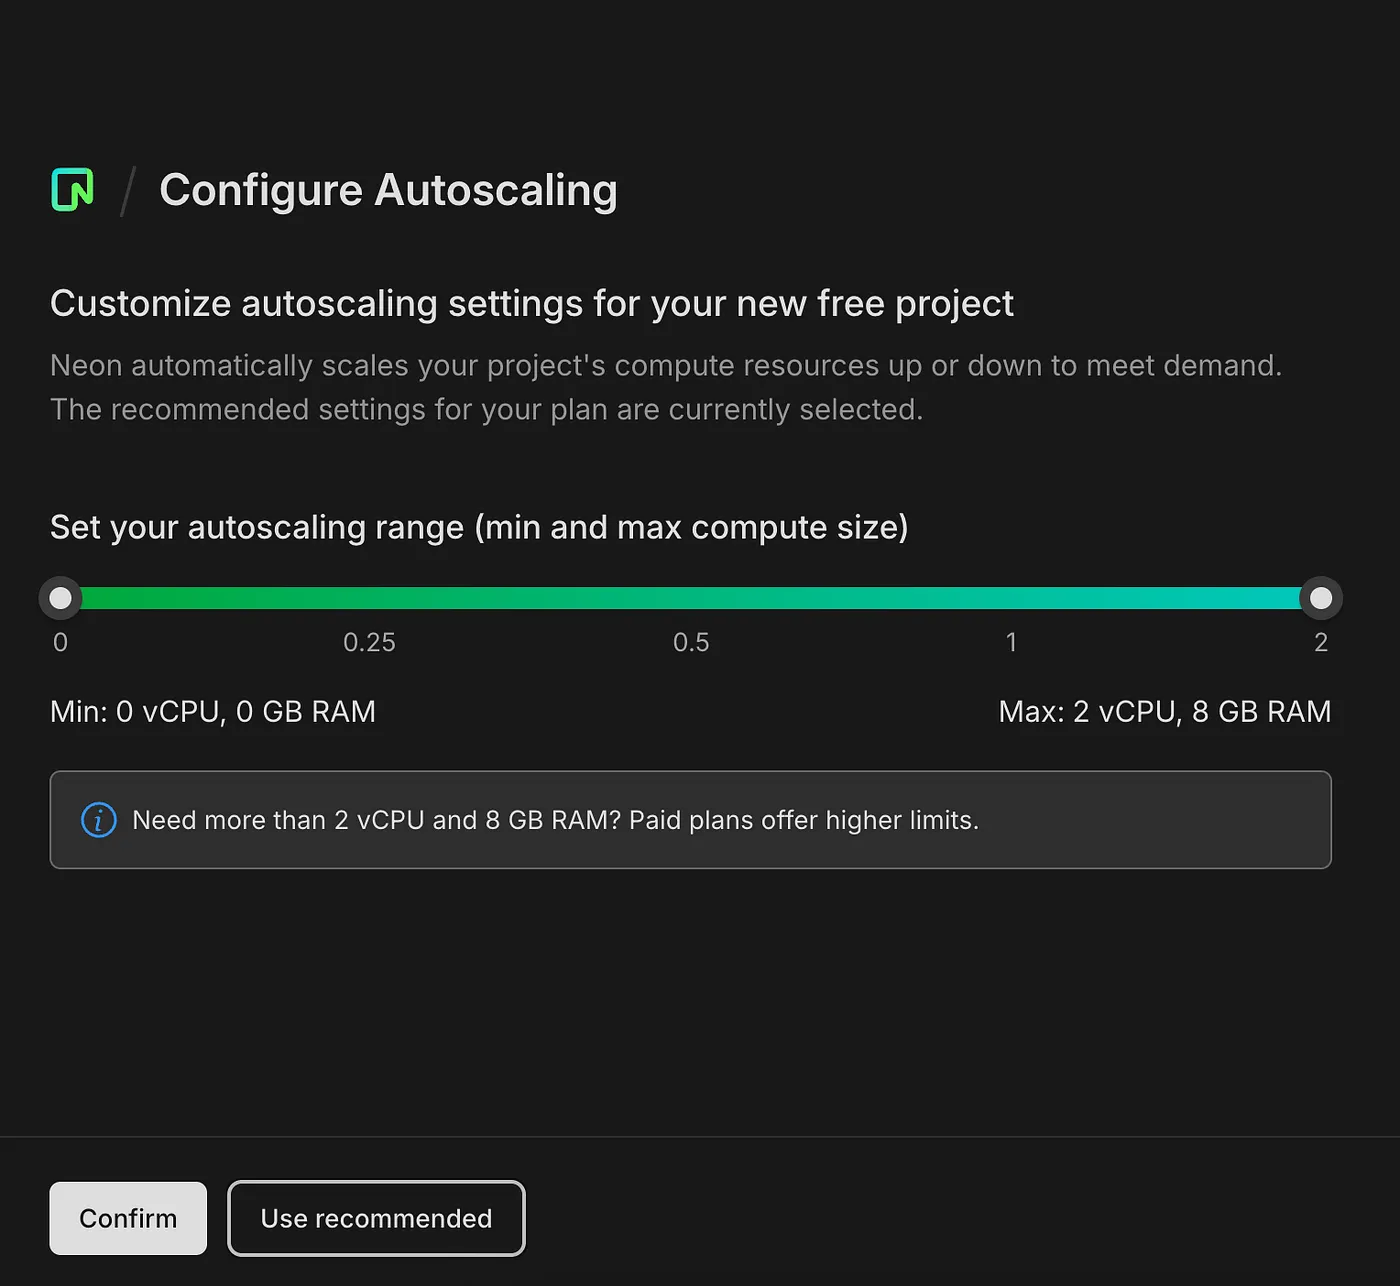
Neon will ask for autoscaling, but we can just click on Confirm or Use recommended for our learning purposes.
After that, your quickstart panel will appear and you can copy the Postgres URL we need.
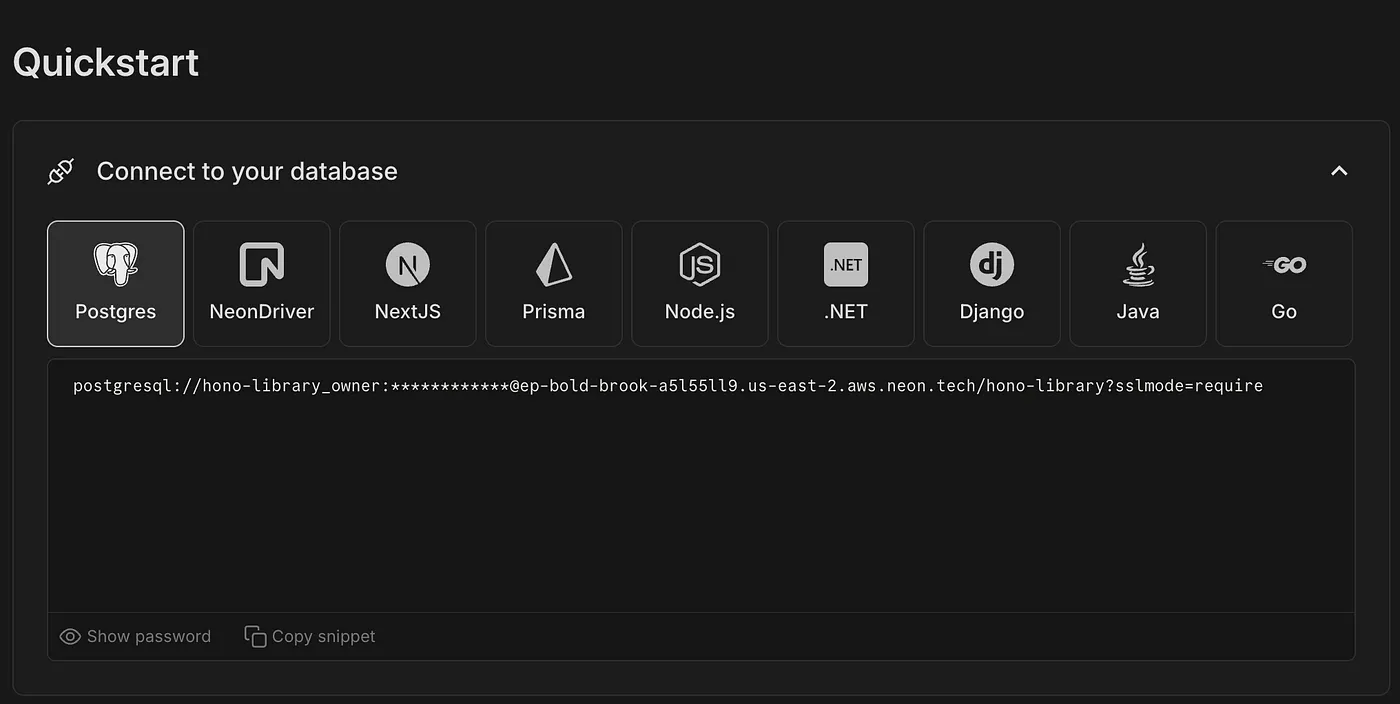
Once copied after pressing on Copy snippet, go to the wrangler.toml file in your Hono project. Uncomment the line [vars], and add the DATABASE_URL environment variable.
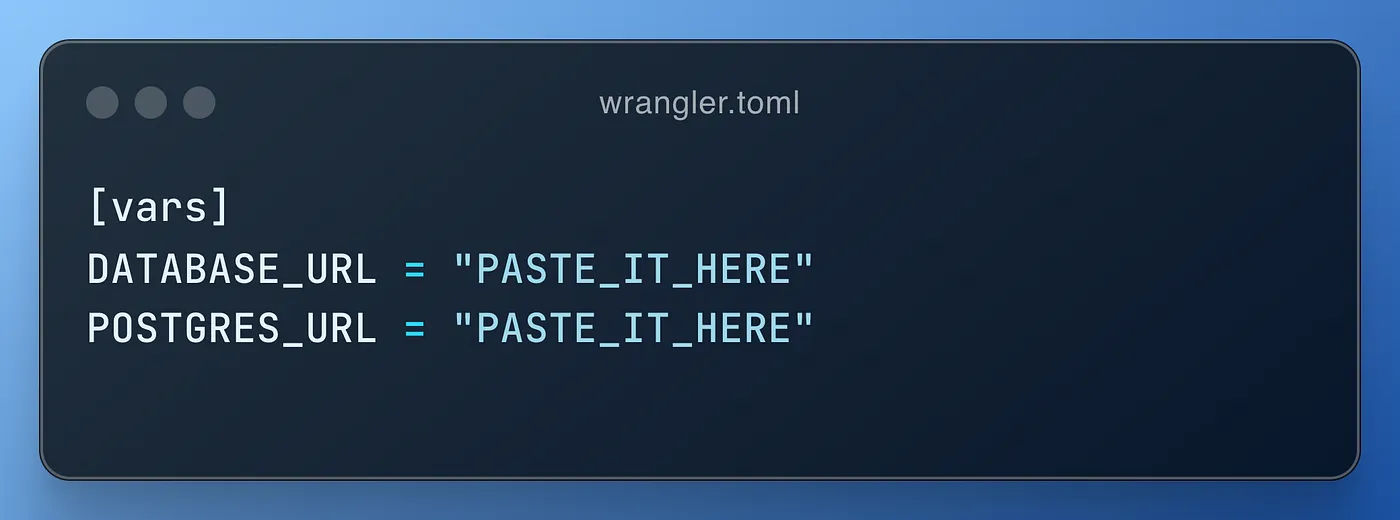
It’s weird not having an .env file, right? We will still need it later in the process, so don't worry. Make sure to create it, too, during this step.
This is how Hono and Cloudflare Workers work. If you deploy your app again, it will set up with those variables. You could also do it through the settings panel in Cloudflare, but the deployment method is faster for development.
2.1. Configure Drizzle
We need to start configuring Drizzle. Run the following commands to install all the required dependencies:

We’ll need four different files to make this work according to Neon’s setup page, which you can find here.
At the root of your project, create a db folder, containing the following files:
First, let’s create our schema, describing a small table that will contain simple fields to recognize and locate media:
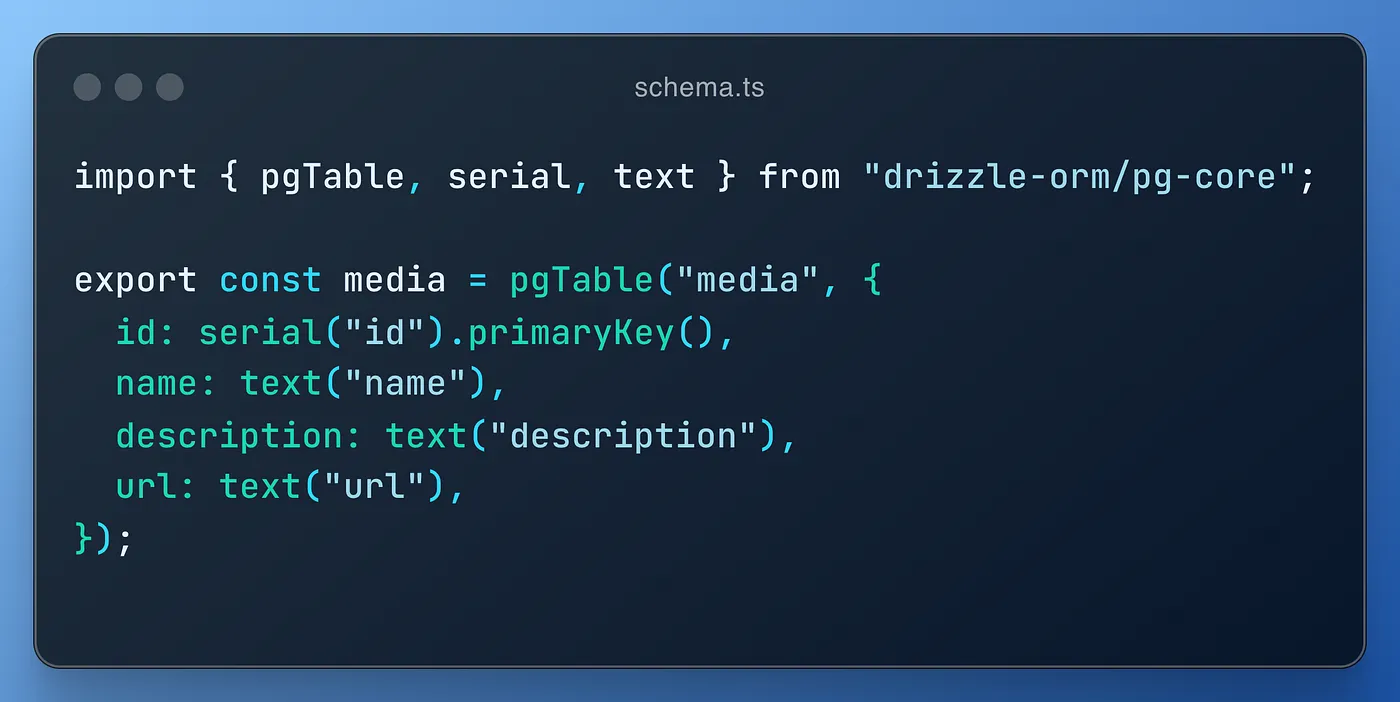
Then, our client will open connections and operate with our database, which we’ll need to use for our requests.
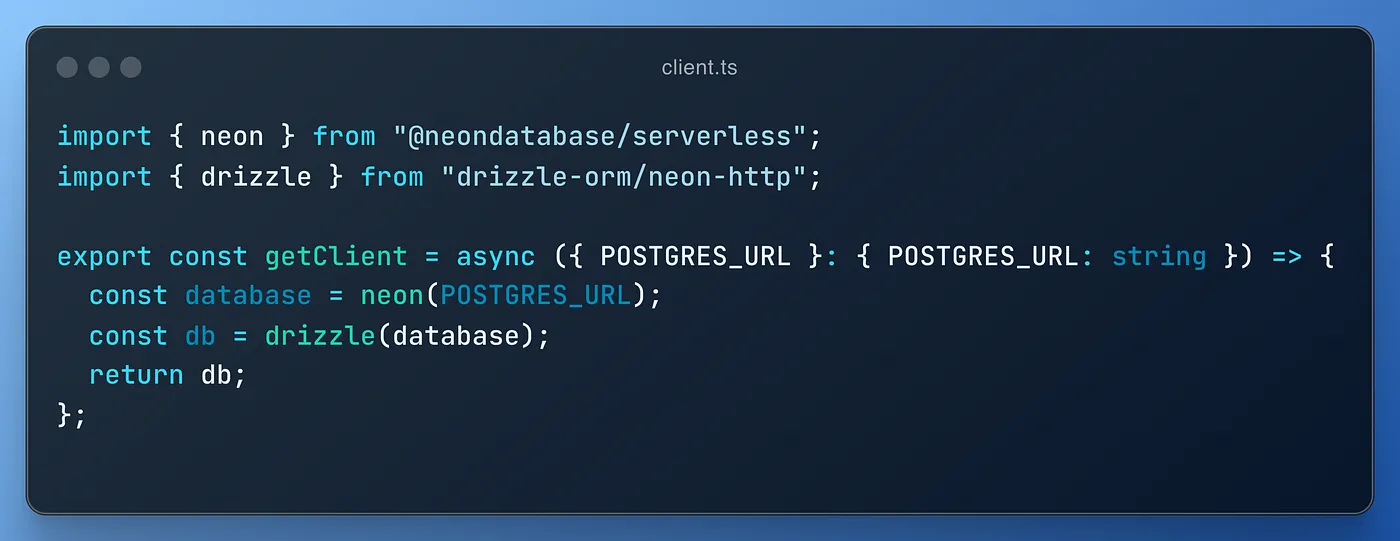
We’ll need to perform migrations at some point, and we’ll also need a specific function.
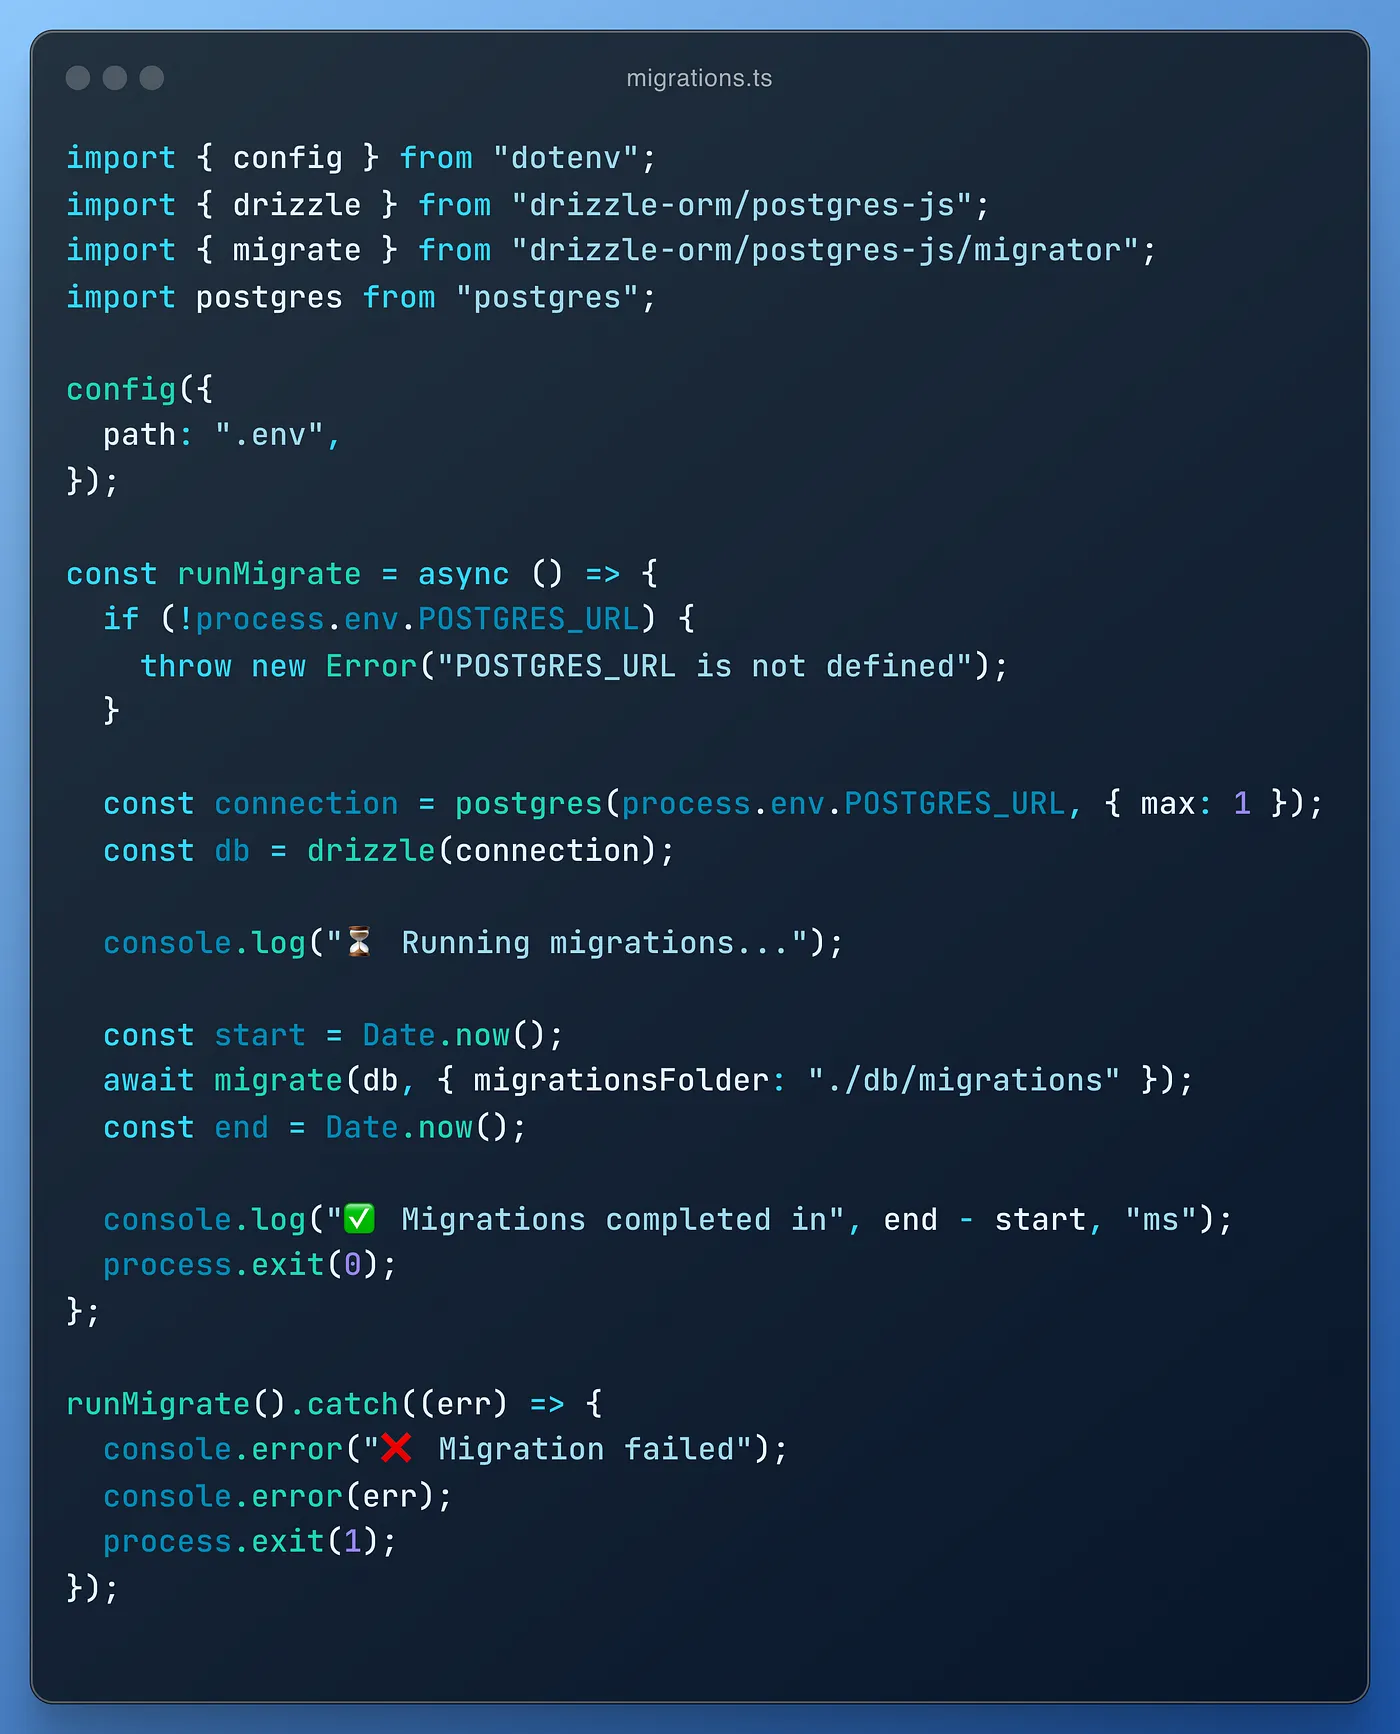
We’re almost done configuring Drizzle; the drizzle.config.ts file is essential, containing all the required settings to make Drizzle work properly.
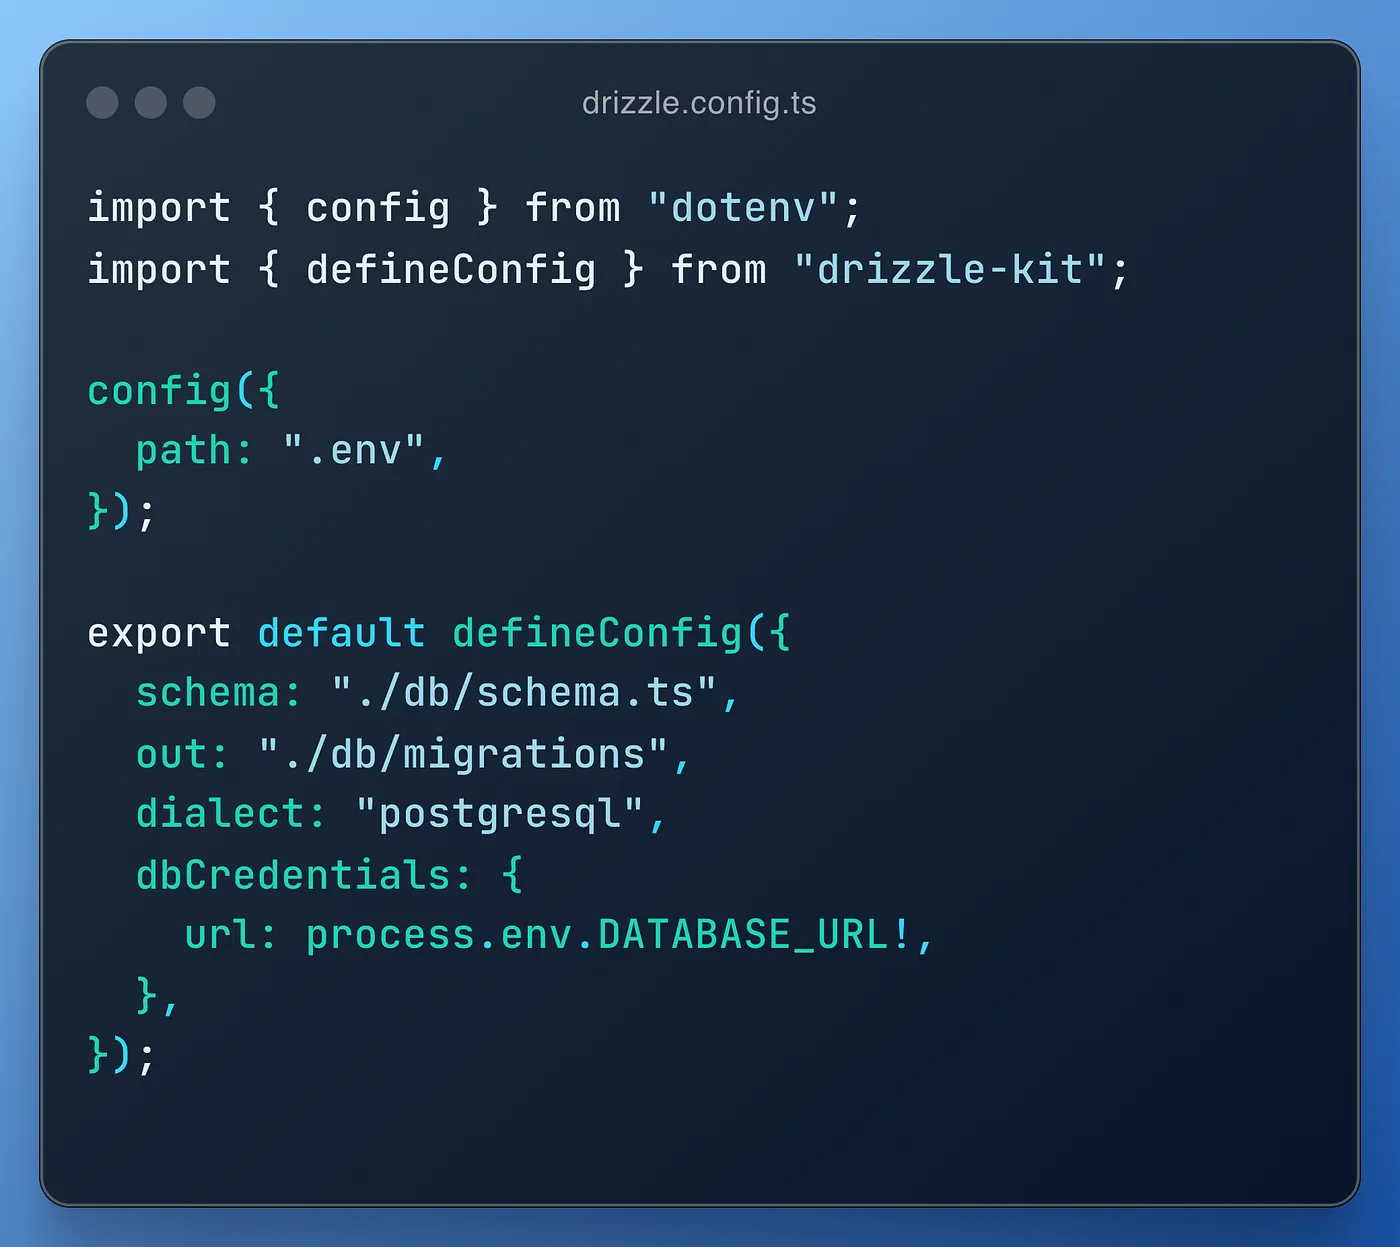
As you can see, the created folders and files are mentioned across the different codes we’ve added.
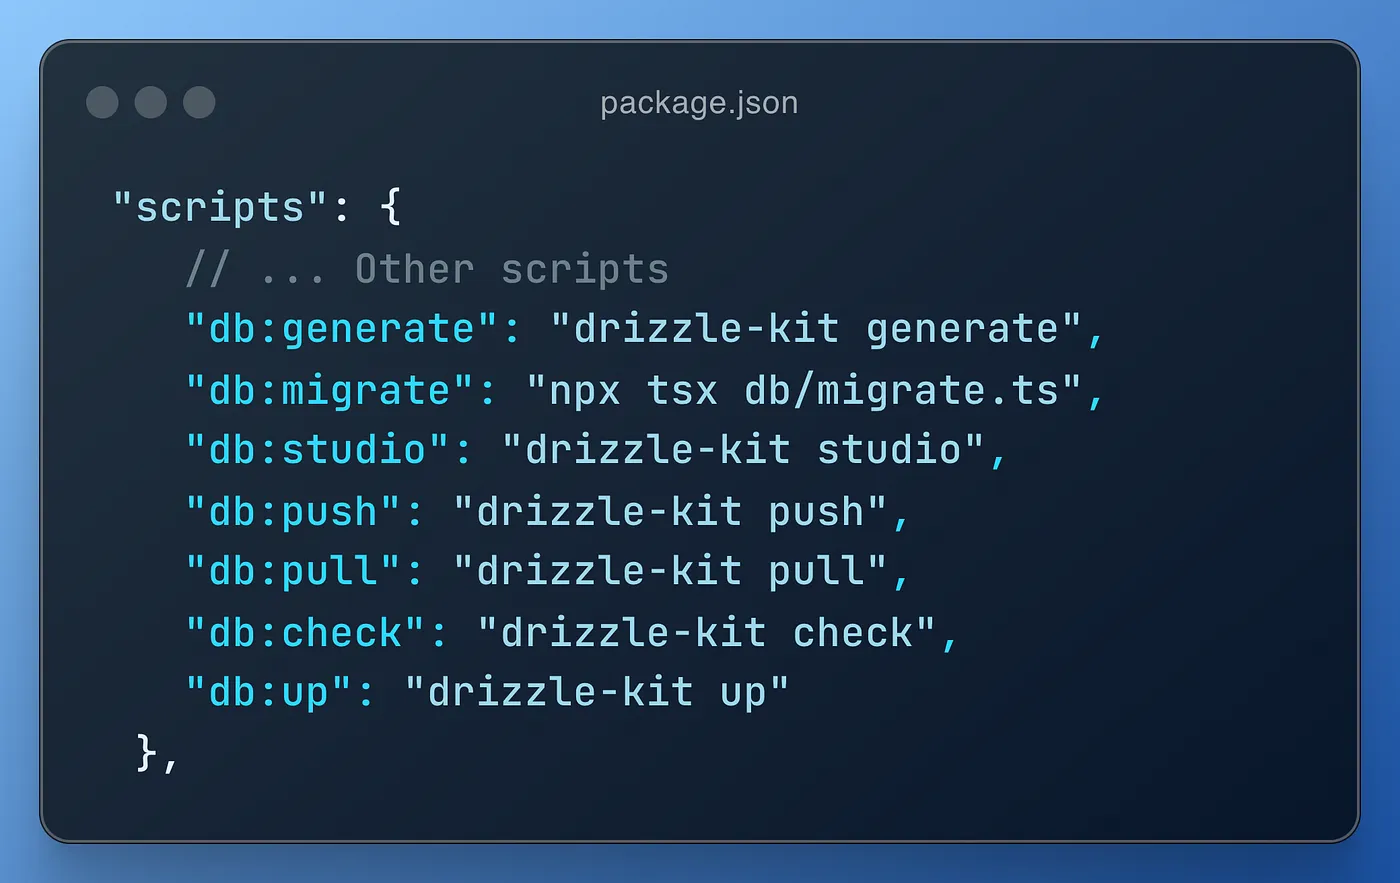
For our last modification, all we have to do is add some commands to our package.json and we should be ready to go. You might not need all of these, but they might be handy to remember.
2.2. Work with Drizzle
We have everything set up to have our database working. Run the following commands in order:

In order, generate will create a migration file based on the types/objects in the schema.ts file. The migration command will update the schema with pending migrations and push them to Neon.
You can learn about all these commands here.
Let’s start working a bit with our data.
If you access https://local.drizzle.studio/, you'll see the following screen.
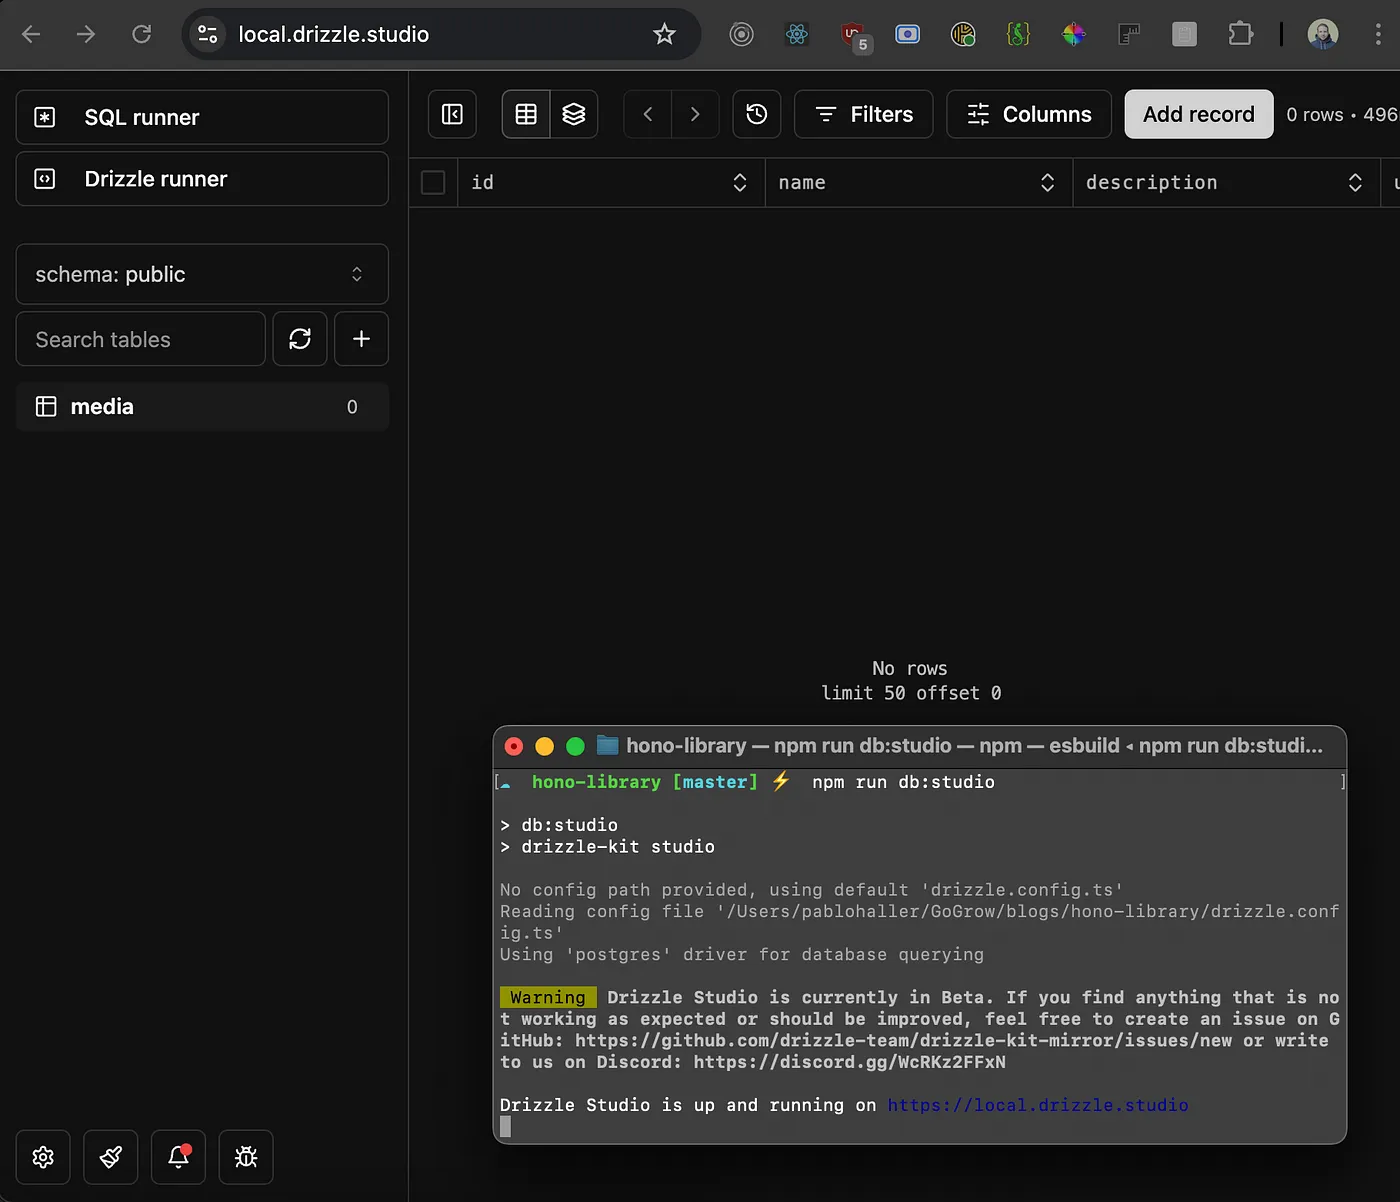
You can click on Add Record, and a row will display to add a new entry. Fill them as you see fit, but remember to hit enter on every field to save the current draft state.
Hit on Save 1 Change and wait for your record to be saved.

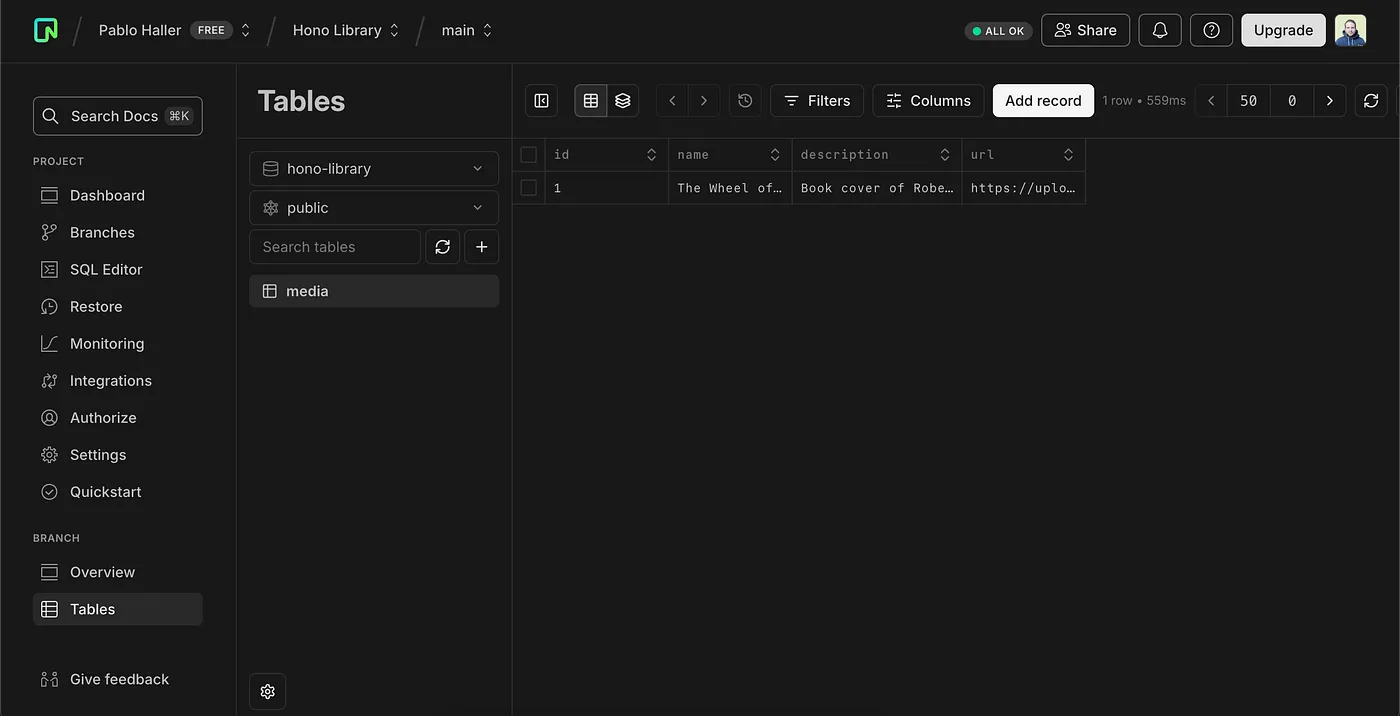
We can check if the data was successfully uploaded to the cloud. Go to https://console.neon.tech/ and click on your project (in this case, Hono Library)
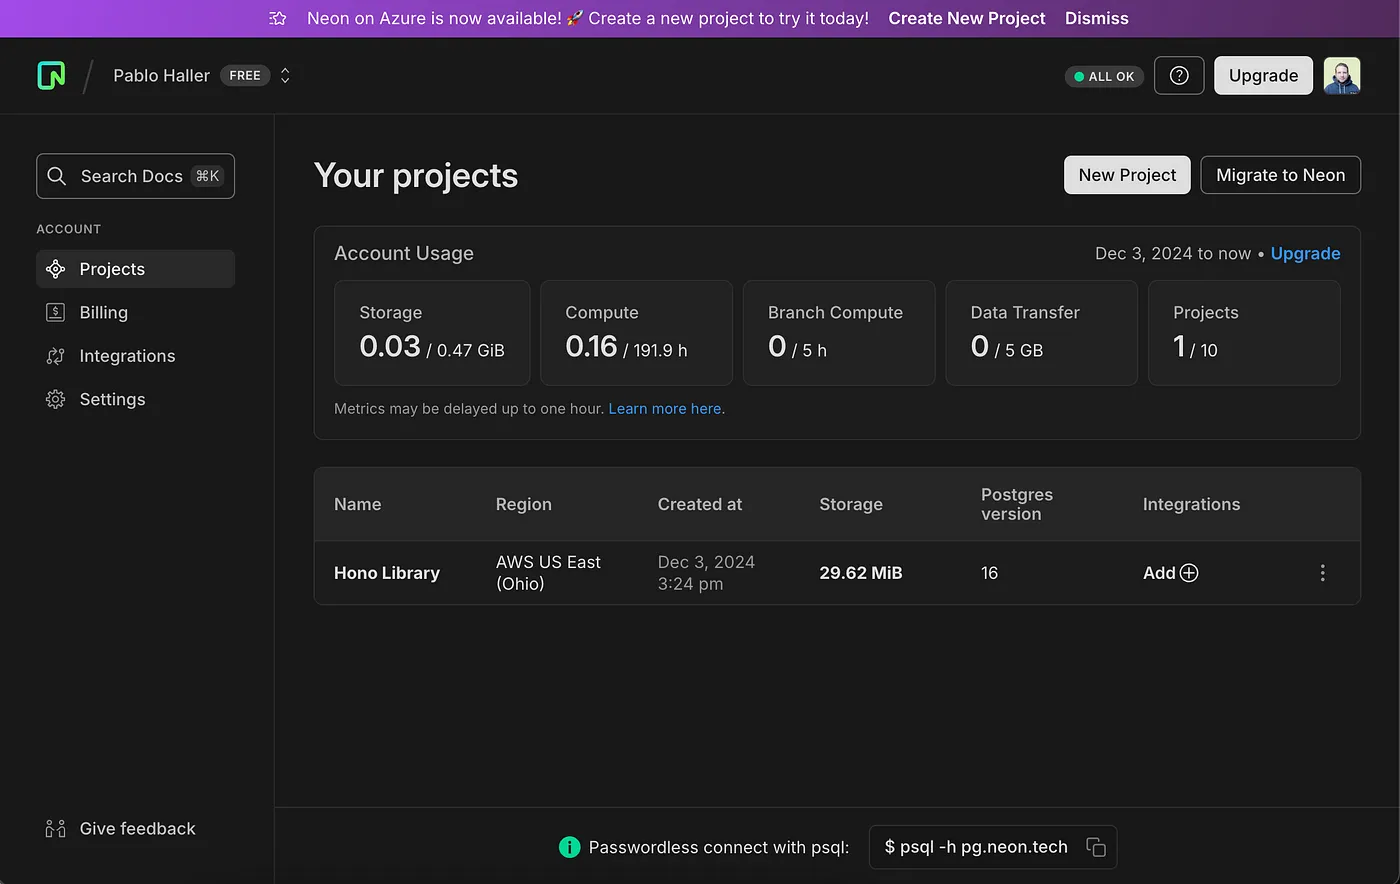
Once there, in the left side menu, look for the Tables option. Click on it, and if everything went well, you'll see your data displayed in the cloud! Isn’t it great?
3. Media endpoint
As we’re learning basics, let’s not focus on different configurations and folder structures to make this look pretty. Let’s just make it work by following Neon’s setup guide.
In your index.ts file, add the following code:
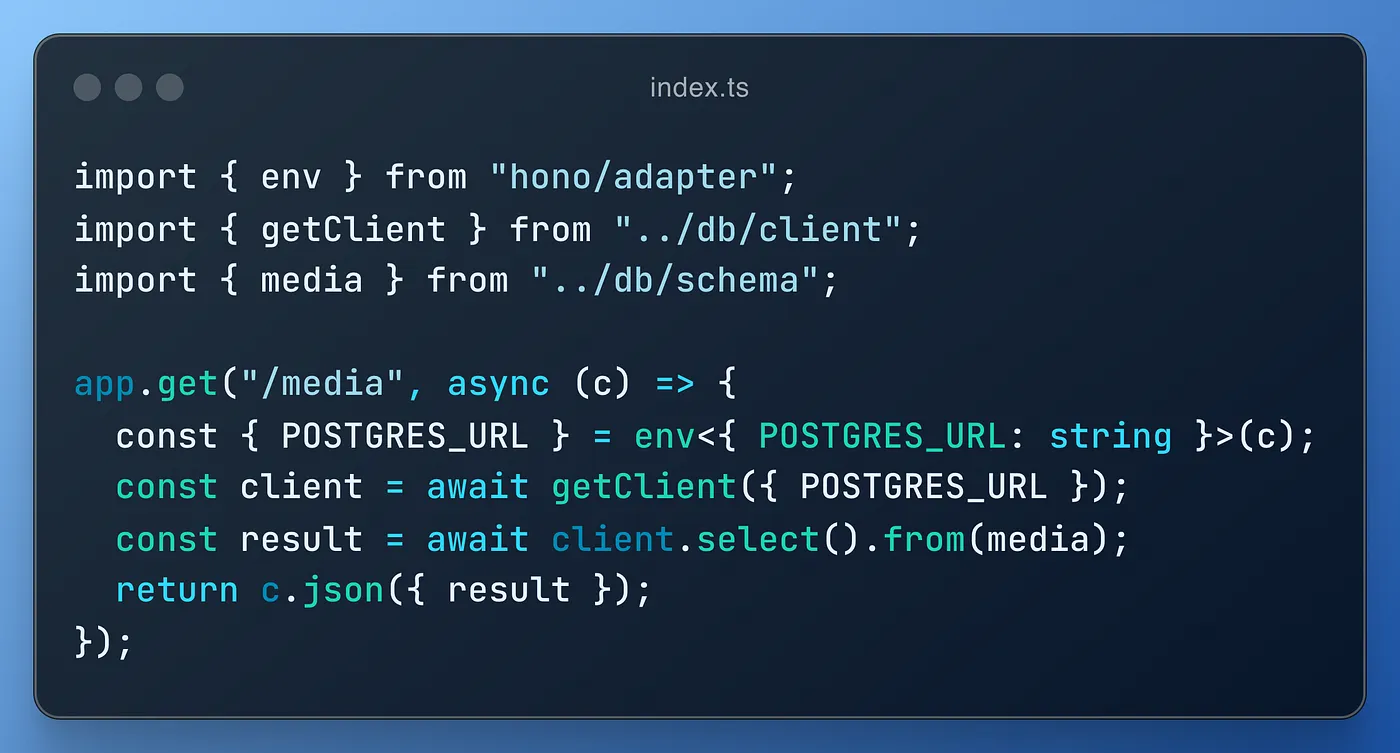
Here, we’re creating a get request. The endpoint will be /media. We get the environment variable for our database URL ( POSTGRES_URL or DATABASE_URL) using the env function from hono/adapter. This is the standard way in Hono to retrieve such variables defined in our wrangler.toml file at runtime.
Then, we get the client we created previously, running a select statement from the media table imported from the schema file. The last step is returning/rendering a JSON (object or array) using the function provided by context as we did before.
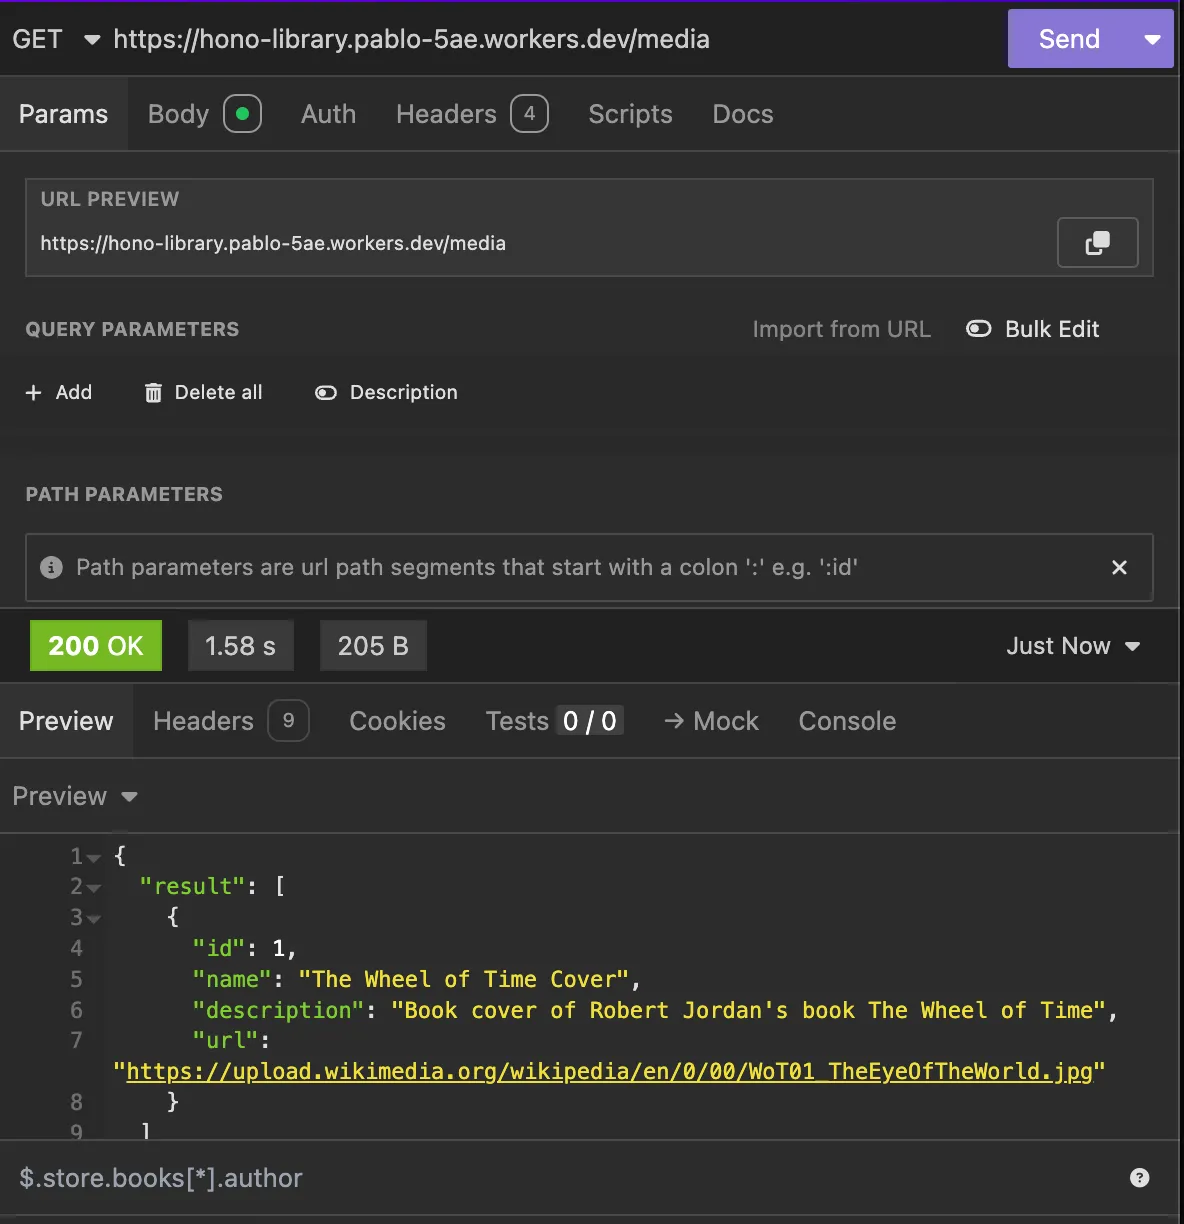
The only thing you need to do now is run your deploy command, wait for it to succeed, and everything should be done. You should be able to see a JSON response from your Cloudflare Worker!
Conclusion
So far, we’ve explored several exciting technologies to help you develop a REST API faster and deploy it in seconds.
But there’s still plenty more to try! Consider this a starting point to dive deeper into what we’ve covered.
You can create new tables with Drizzle, relate and migrate them to the cloud, and then build the necessary endpoints with Hono to create, read, update, and delete data. Finally, deploy everything using Cloudflare Workers to see your changes live in seconds.
If you’re in trouble, here are some helpful links that guided me through this journey:
- Hono’s Cloudflare Workers, [https://hono.dev/docs/getting-started/cloudflare-workers].
- Hono’s Getting Started, [https://hono.dev/docs/getting-started/basic].
- Neon’s Build a serverless API using Cloudflare Workers, Drizzle ORM, and Neon, [https://neon.tech/blog/api-cf-drizzle-neon].
- Drizzle’s Drizzle <> Neon Postgres, [https://orm.drizzle.team/docs/connect-neon].
- Migrations with drizzle-kit, [https://orm.drizzle.team/docs/kit-overview].
- Drizzle’s basic select, [https://orm.drizzle.team/docs/select#basic-select].
- Vercel’s Next.js AI Chatbot, [https://vercel.com/templates/next.js/nextjs-ai-chatbot].
And the link to the repository with all this code: [https://github.com/pablohaller/hono-library?source=post_page-----eafca87b0b1b--------------------------------]


