What are we going to do?
Using Algolia (a cool, blazing fast search engine) and InstantSearch (a UI library used to make search interfaces) together yields powerful results. Alongside NextJS (cutting edge full-stack JavaScript framework beolved by many), these programs help us seamlessly organize subjects however we want them. In this article, we’re going to pick some characters from a video game (Genshin Impact) and display them in a fancy way using the aforementioned programs. The end results are quite user-friendly, allowing them to filter through and explore all of InstantSearch and Algolias’ features.
As an extra, we’ll also tinker with Vercel (a front-end cloud provider). Together with Algolia, we’ll deploy our application and make it accessible to all visitors!
Setting up Algolia
1. Sign up!
This is the easiest part! You can do it just by clicking on the Sign Up button on their page, and filling in the required information using your Google Account.
2. Basic Setup
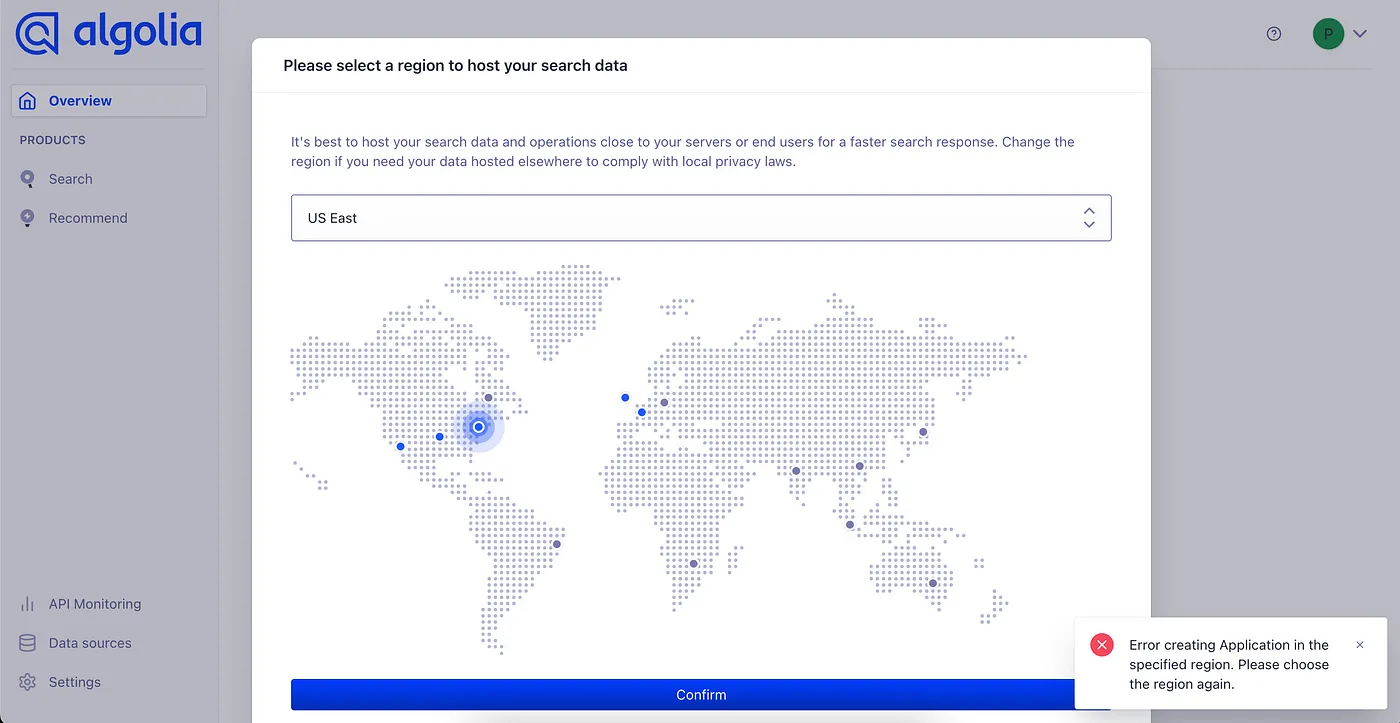
Wait until your dashboard loads.
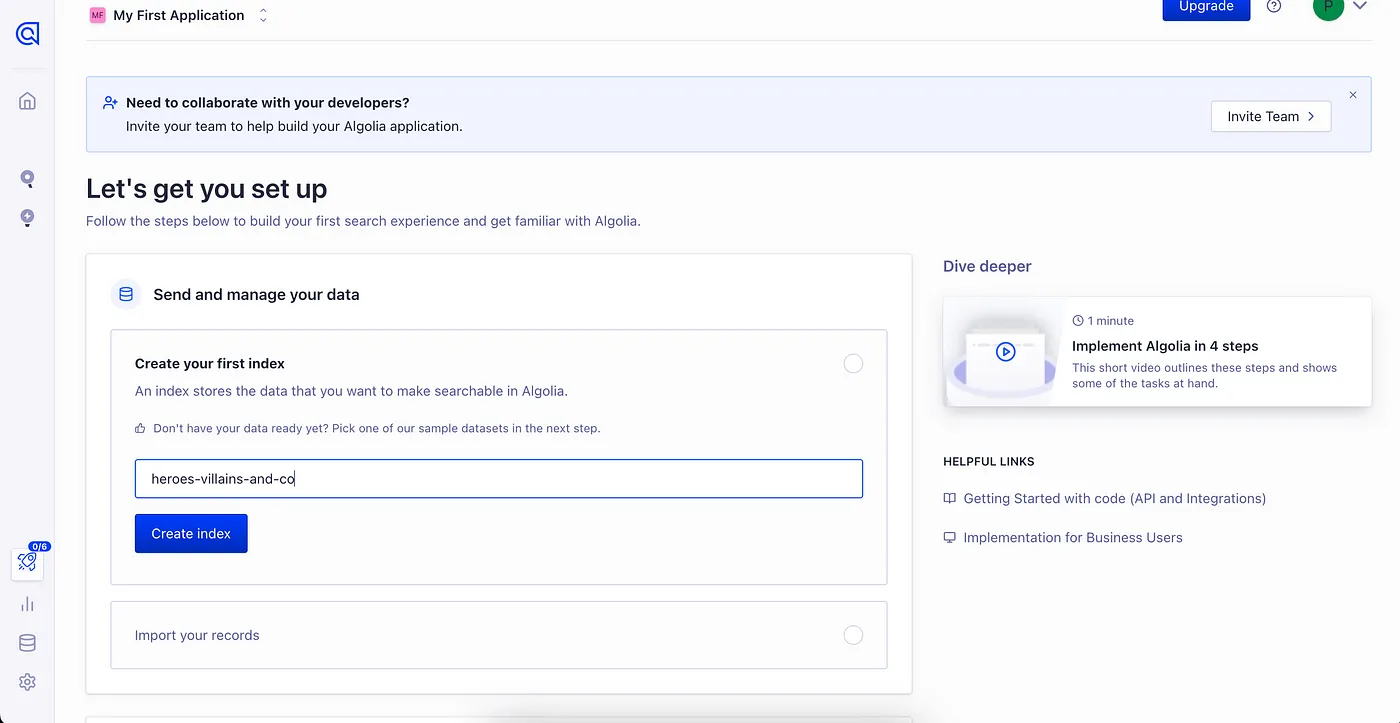
Here, we can create our index, which stores our data. I’ll create mine with the name characters, as you can see it in the picture. Hit on Create Index, and wait until Import your records is available.
We can do this step in many different ways. Algolia offers us plenty of connectors and libraries, but we’re going to focus on a specific case to show how easy it is to use NextJS as a full-stack framework.
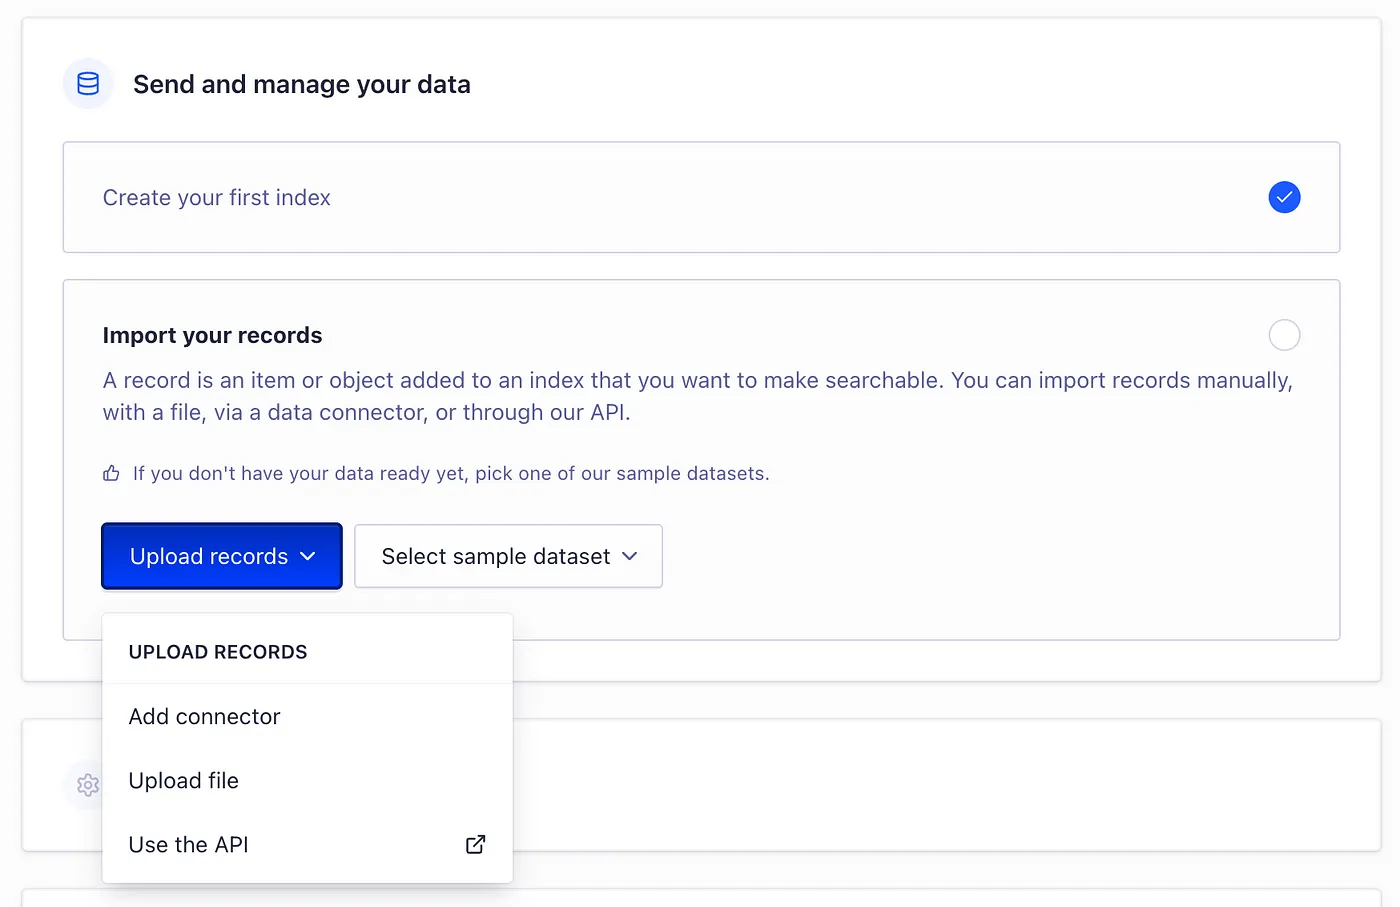
Click on Upload records, and select Add connector. You will be redirected to the Connectors tab of Data Sources.
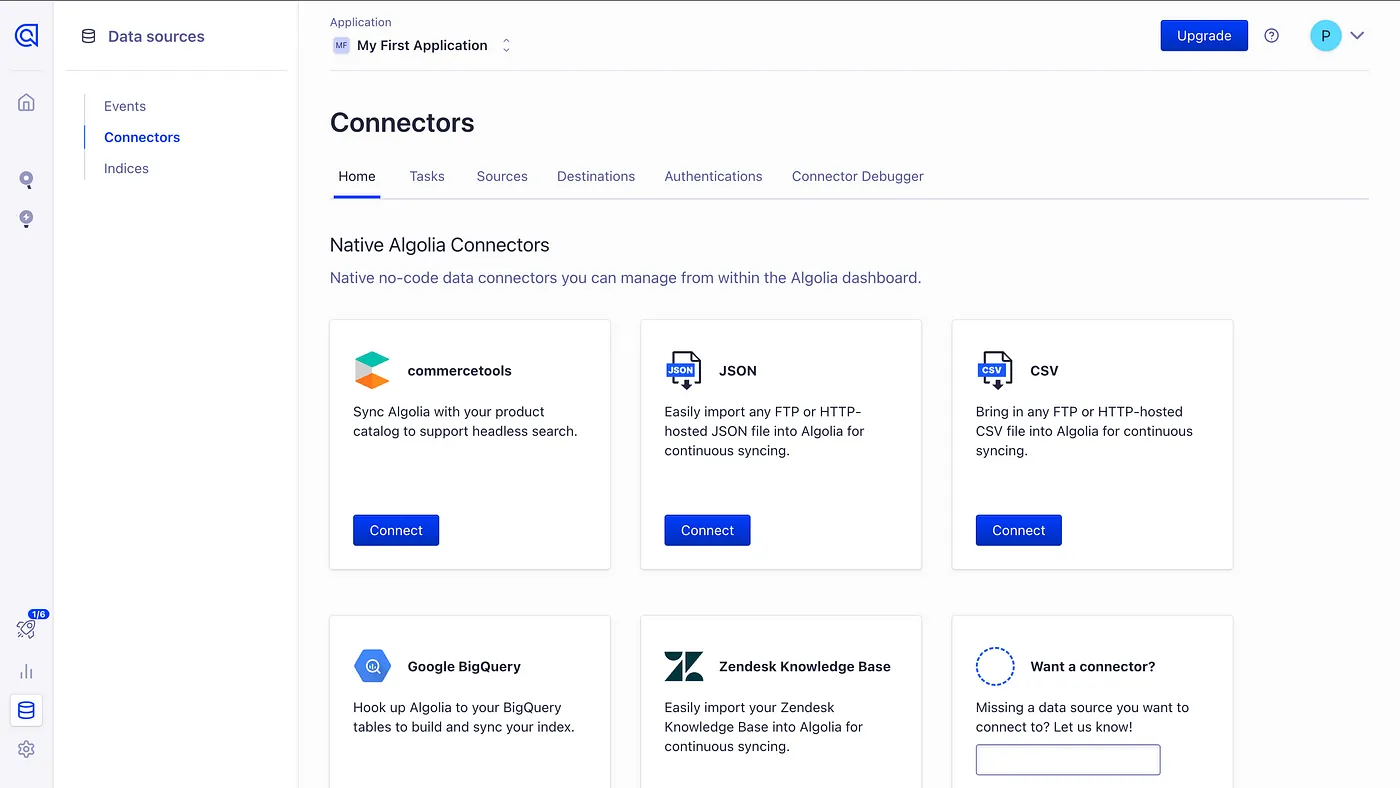
In my experience, records are usually stored in a single .csv file, so we're going to do it that way. Select the CSV option, and press Connect. It will display a new screen, where you will need to click on Get Started to start configuring.
2.1. Data Source Configuration
Before we consider how our data will come out (because I haven’t thought of it yet), we’ll start developing our endpoint.
In this new screen, you’ll see different fields we need to set up.
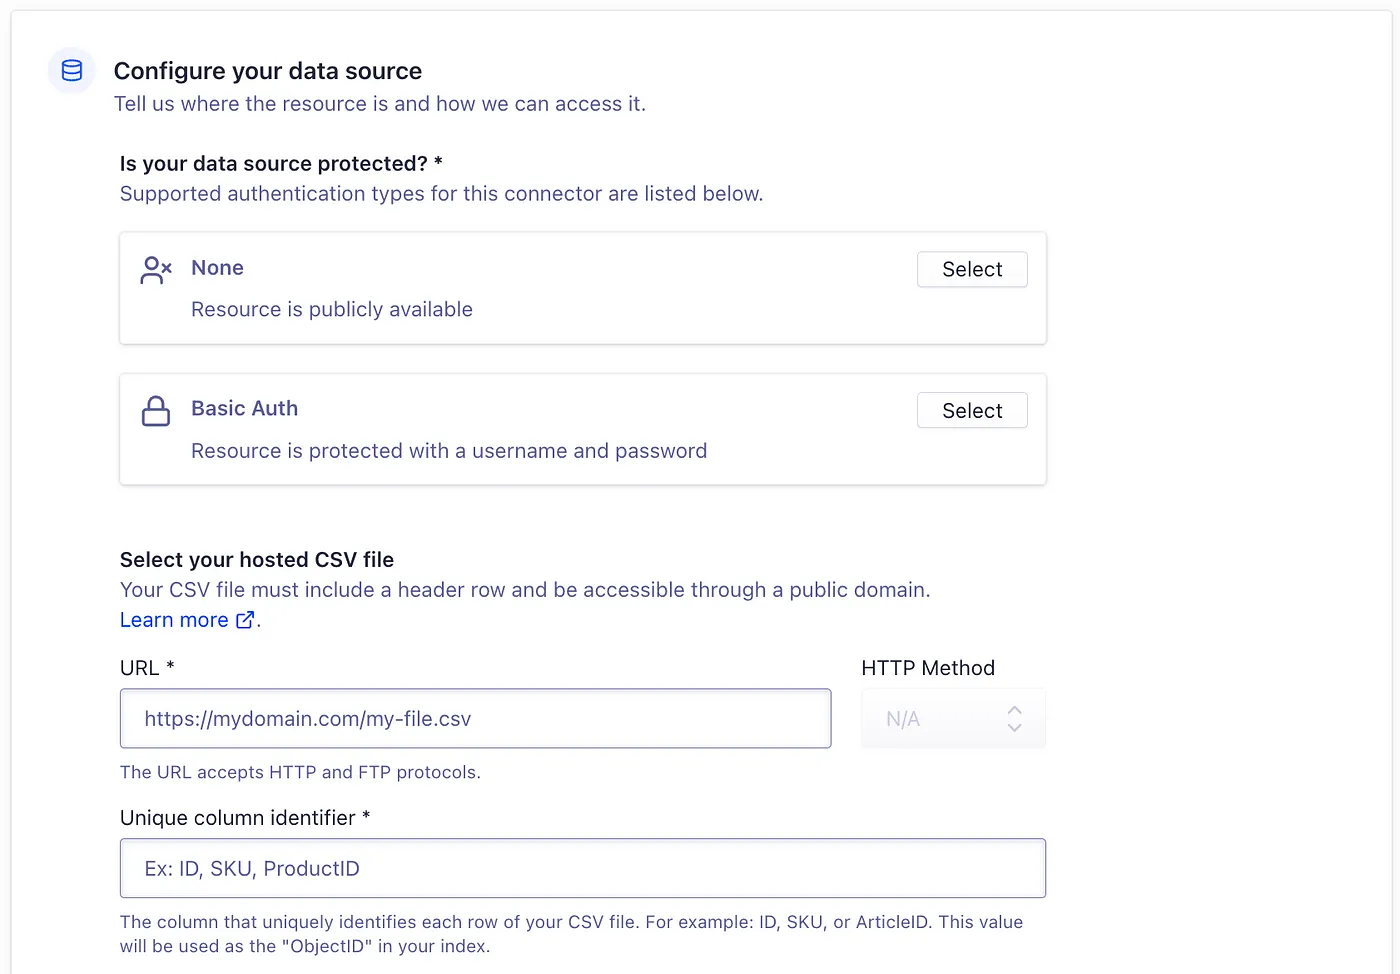
The first one is asking if our data is protected. We want to consider this as somewhat sensitive data we don’t want people freely downloading. To protect it, we will use Algolia’s suggestion (basic auth) to authenticate and authorize access to our .csv.
2.1.1. .csv API route.
This is a great moment to do some hands-on learning. If you don’t have any experience using NextJS, please read the docs I’ve highlighted here. If you don’t already have NextJS installed, go ahead and do so; once you have, go check the official Get Started Installation Guide.
Open up your terminal, and go to the folder where you want your project to live in. Execute the following:
npx create-next-app@latest algolia-instantsearch --typescript --tailwind --eslint --app --no-src-dir --import-alias="@/*"As you see, there are many options. Normally, you’d set them up manually while Vercel’s scaffolding tool runs in the background, but you can also skip those steps using the command above.
Once the installation is finished, we can finally code a little bit.
Let’s first serve the .csv file.
Inside your app directory, create the following file: api/csv/route.ts.
⚠️ For development purposes ONLY, create adata.csvunder a newdata/folder in the root of your project. This will generally be inside a secure path, generated by some other piece of software. Don't recreate this in a real production environment.
Feel free correctly populate your data.csv, or just leave some headers there to see if they are actually being downloaded.
You can also copy the file directly from this repository. You should already know where it’s located.
Going back to the API endpoint, you’ll need to read the file. NextJS has its own preferred method, which you can find here.
Copy and paste the following code.
import { NextResponse } from "next/server";
import { promises as fs } from "fs";

export async function GET() {
  const csvDirectory = path.join(process.cwd(), "data/data.csv");
  const file = await fs.readFile(csvDirectory, "utf8");

  return new NextResponse(file, {
    headers: {
      "content-type": "text/csv",
    },
  });
}
This will only get the file, and then return it.
What if we test it?
Run npm run dev in your terminal, go to your browser enter http://localhost:3000/api/csv, and see how the file is downloaded!
Exciting, isn’t it? It should be ready, but we still need to add some sort of auth mechanism. Specifically for this, we’ll catch only on this route.
⚠️ Again, for development purposes only, and to avoid over-extending this post, we’ll use hardcoded values. The username and password should be generated for each user/entity (in this case, Algolia), using secure mechanisms of storing and data extraction.
The resulting code can look like this. Feel free to do all the modifications you want to make it prettier!
import { NextRequest, NextResponse } from "next/server";
import path from "path";
import { promises as fs } from "fs";

export async function GET(req: NextRequest) {
  const authHeader = req.headers.get("authorization");

  if (!authHeader) {
    return NextResponse.json(
      { message: "Unauthorized" },
      {
        status: 401,
      }
    );
  }

  const auth = authHeader.split(" ")[1];
  const [user, pwd] = Buffer.from(auth, "base64").toString().split(":");

  if (user !== "4dmin" && pwd !== "testpwd123") {
    return NextResponse.json(
      { message: "Unauthorized" },
      {
        status: 401,
      }
    );
  }

  const csvDirectory = path.join(process.cwd(), "data/data.csv");
  const file = await fs.readFile(csvDirectory, "utf8");

  return new NextResponse(file, {
    headers: {
      "content-type": "text/csv",
    },
  });
}
Now, if you try to access it from your browser, you shouldn’t be able to do anything. You can use a tool like Insomnia to make a new request, making it quite easy to add your authorization header
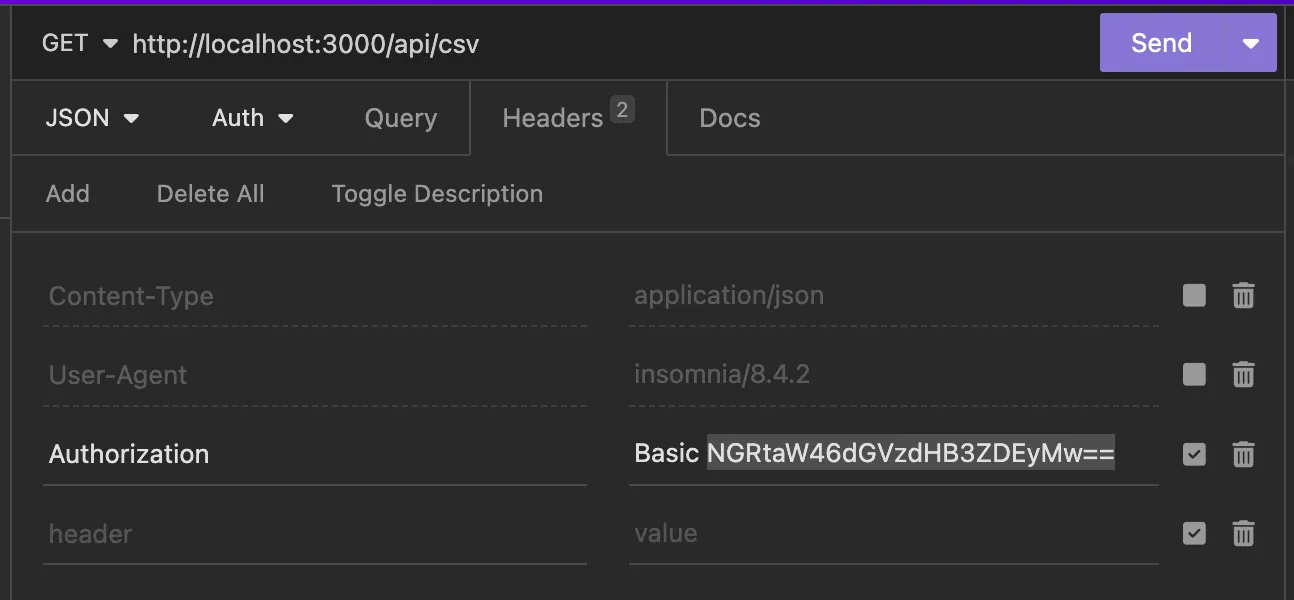
For those “credentials”, the encoded Base64 string you need is NGRtaW46dGVzdHB3ZDEyMw==. Remember that, if you want to change the password or username for any reason, you'll need to encode it again, which you can do with this btoa using JavaScript.
Everything should be ready, right?
Unfortunately, Algolia won’t let us use localhost to upload our data. That would be a problem if we didn’t have Vercel, which offers a suitable free tier that will host our application.
2.1.2. Host app in Vercel
There are some critical steps to take at this stage: pushing your project in GitHub, and signing up/logging in to Vercel using your GitHub account to make the whole process easier.
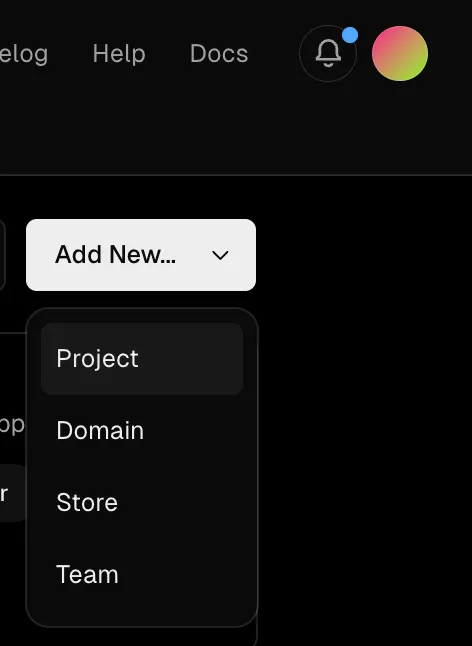
Once in your Vercel dashboard, click on Add New..., and select Project.
A new screen will appear where you can select your repo. Click on Import right next to its name:
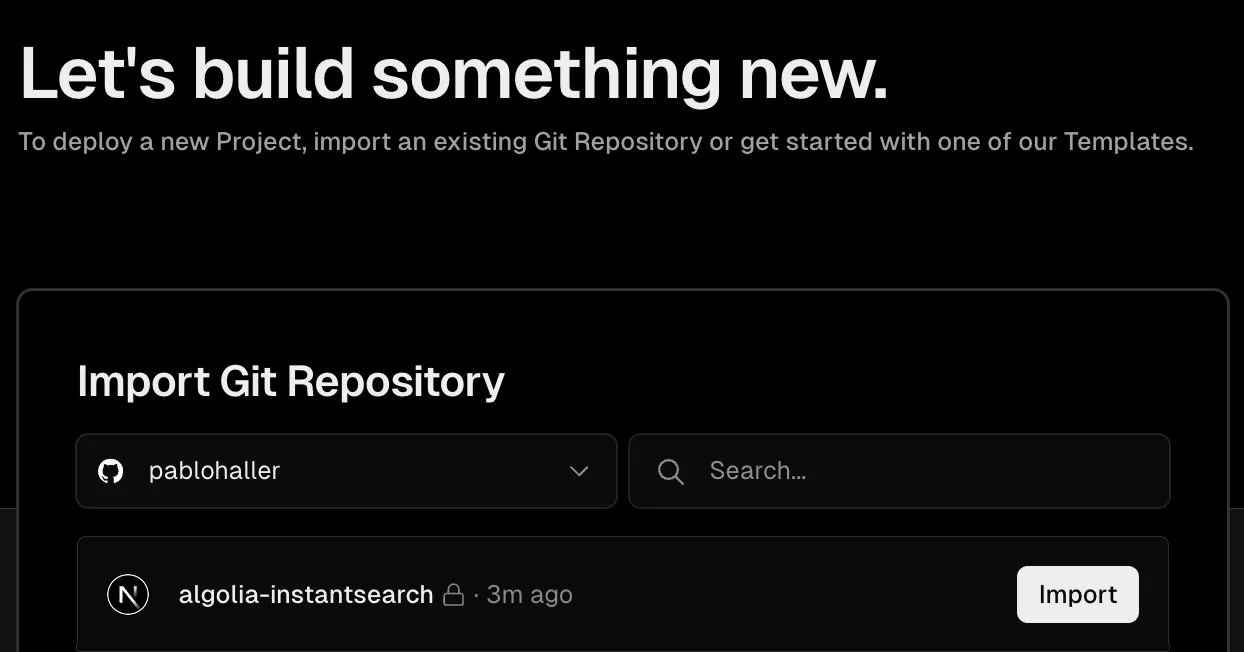
At the next screen, leave it as it is and just click on Deploy.
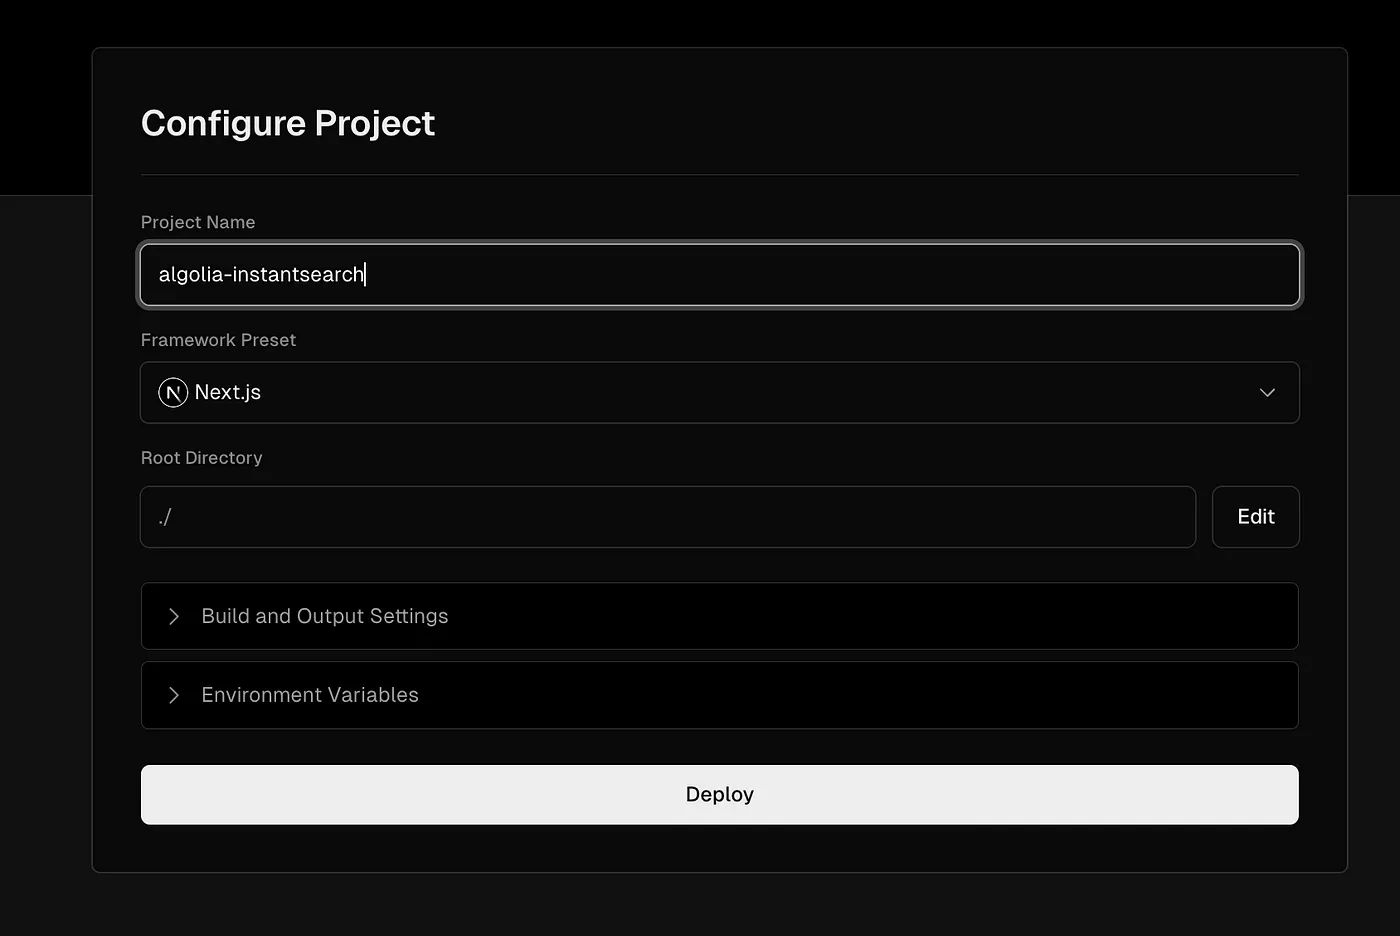
Wait until your project is fully deployed. A screen like this should then appear:
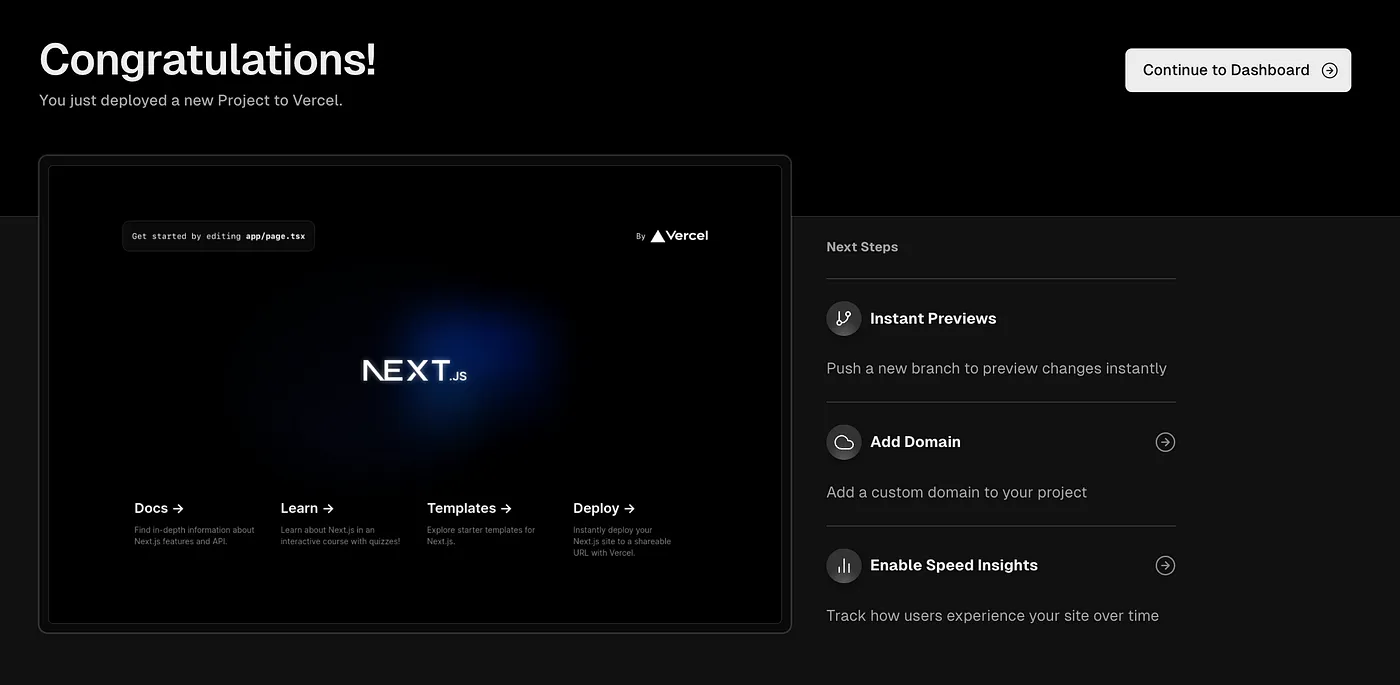
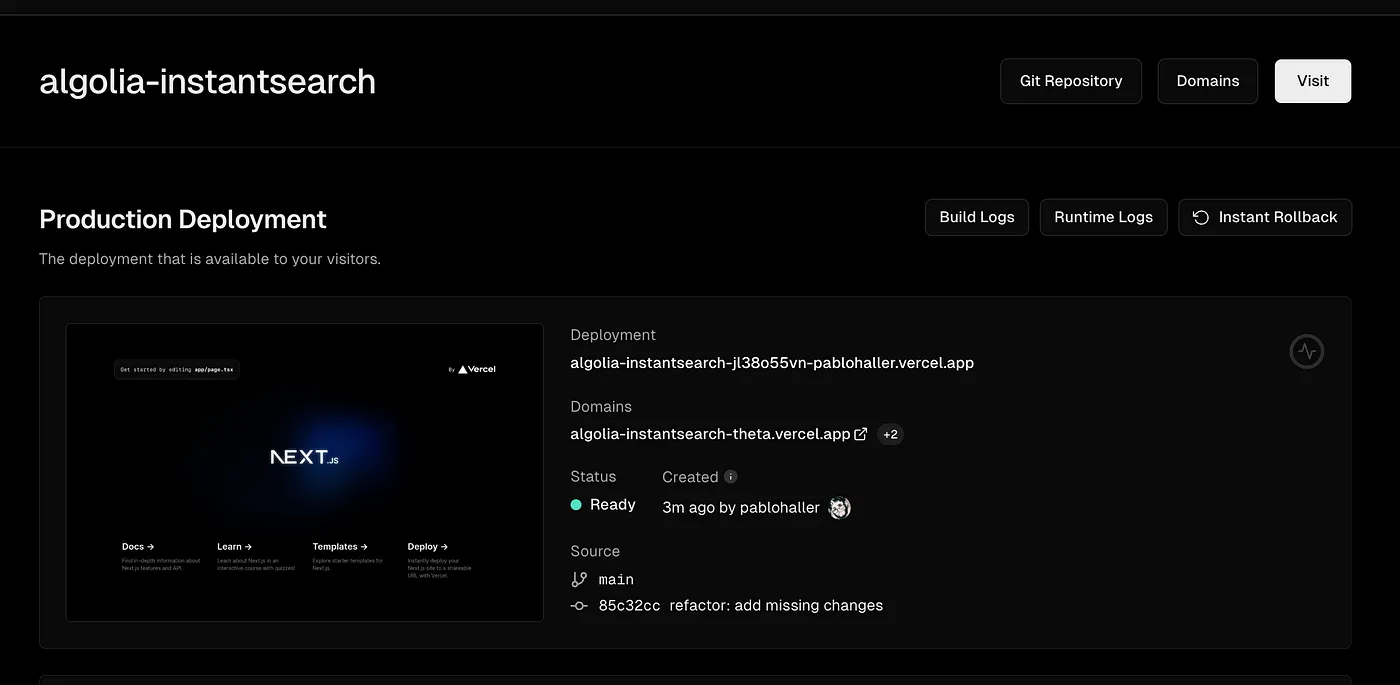
Click on Continue to Dashboard. You'll see the following screen, where you can copy and paste the URL in the Domains field.
2.1.3. Connect hosted app to Algolia
Let’s go back again to the CSV Connection screen.

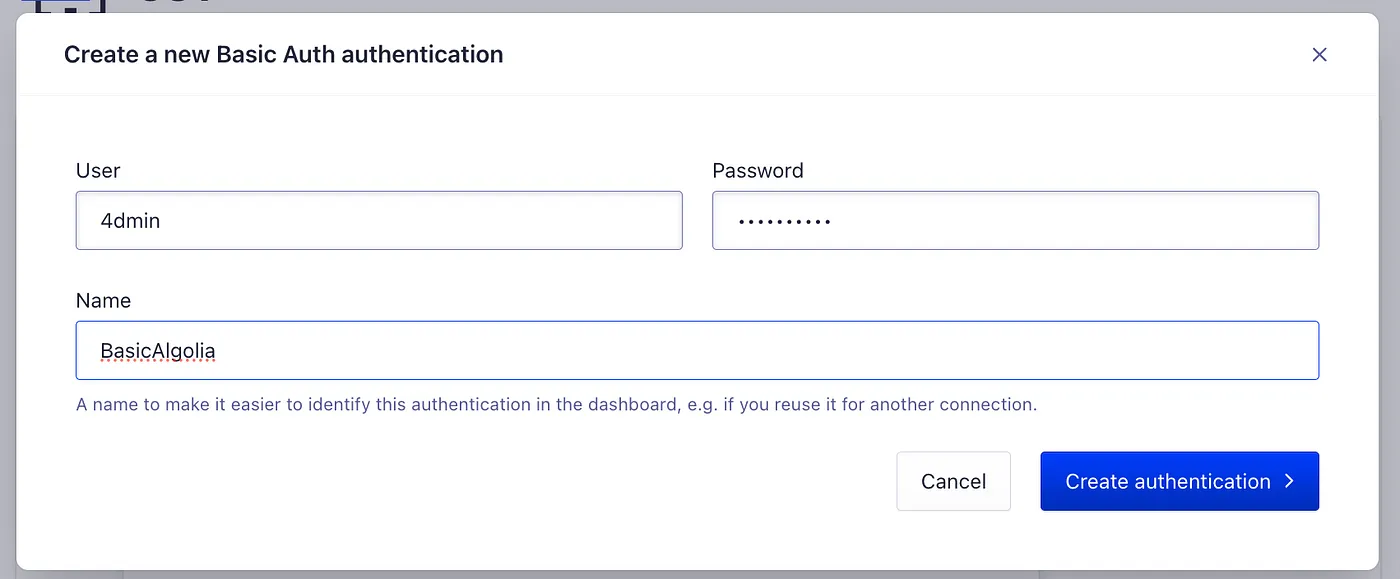
Click on Select next to Basic Auth. Click on the input, and then on + Create a new Basic Auth authentication.
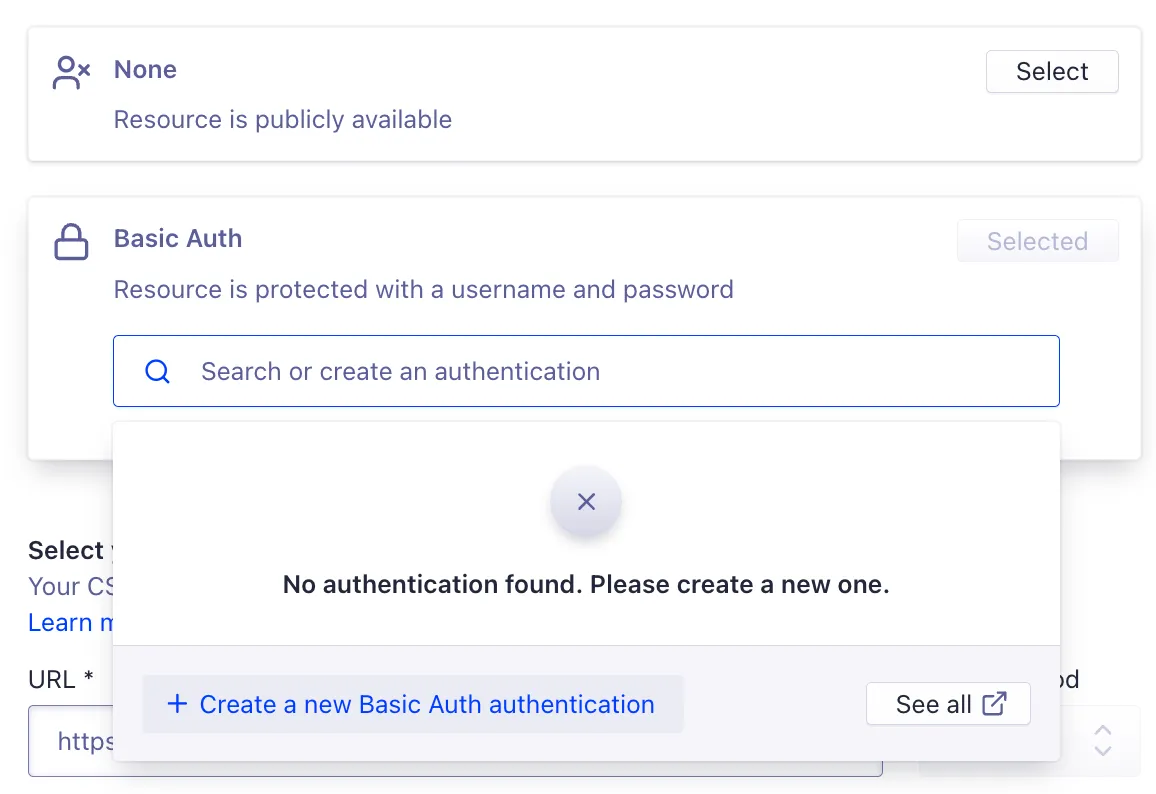
Then, a popup will display. Fill it with the same credentials as the code, and click on Create Authentication.
Now, fill out the next fields.
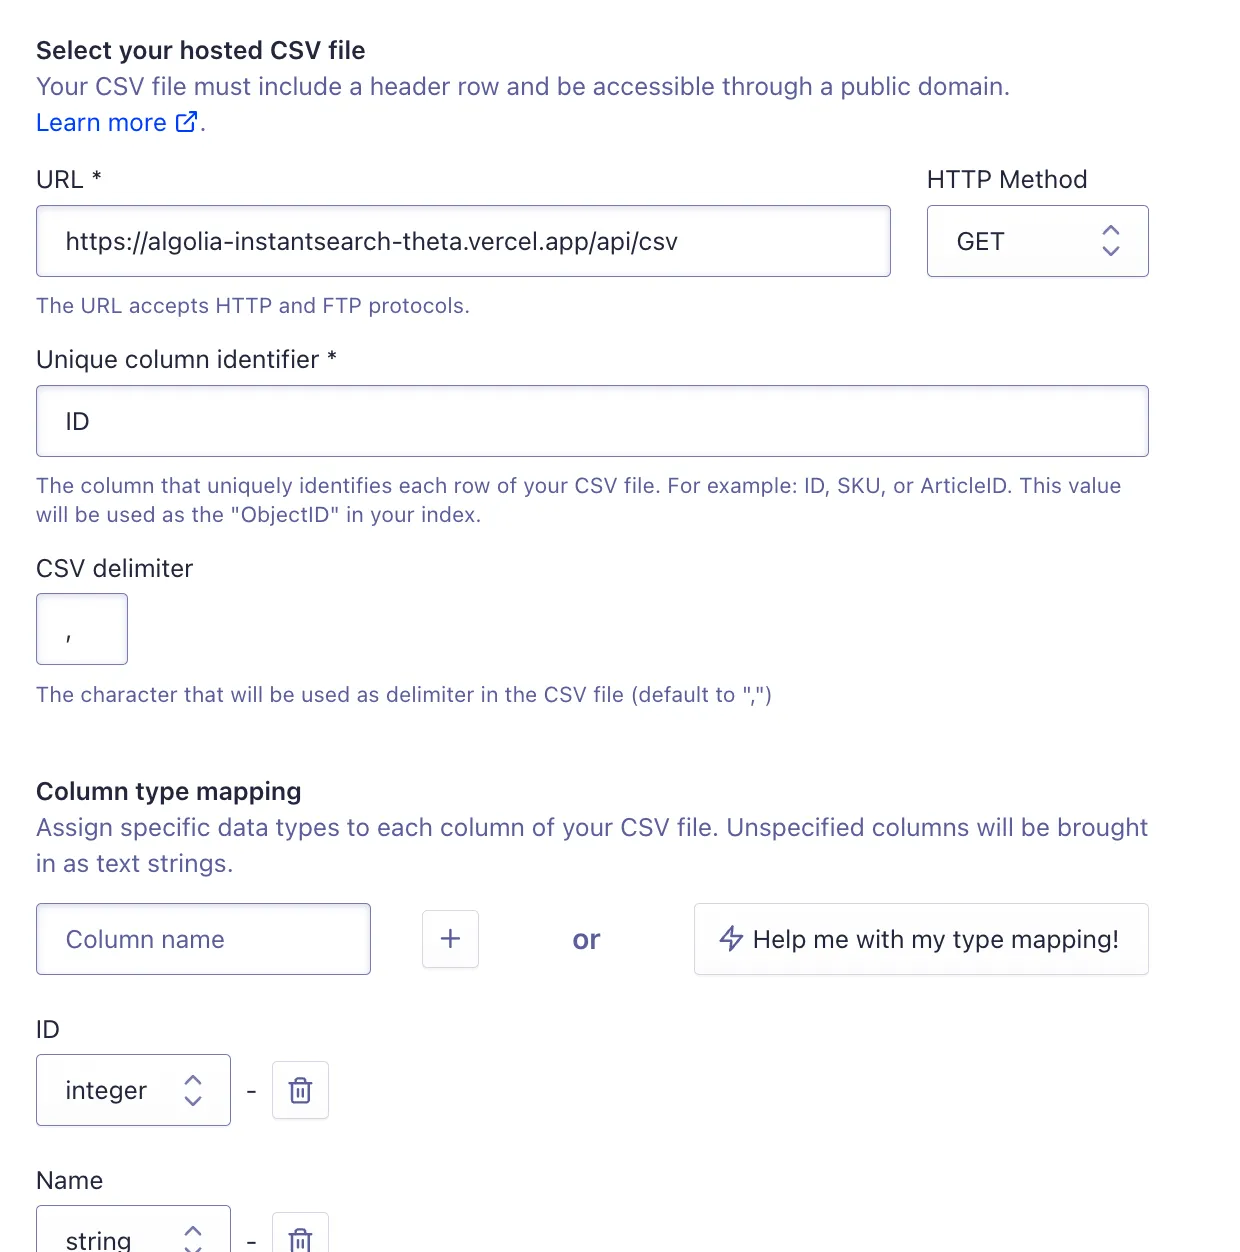
Copy and paste the URL that Vercel provided us into the URL field. Don't forget to add /api/csv at the end.
For Unique column identifier, use the ID.
For Column type mapping, click Help me with my type mapping, and copy and paste the first lines from your .csv file. Algolia will do the rest!
Finally, assign any name you want for this collection, and click on Create Source.
For the next step, select your index and click on Create one for me. This will create a set of credentials to add the data to the index. You can go through a manual process, but this is faster for this guide. Finally, click on Create destination.
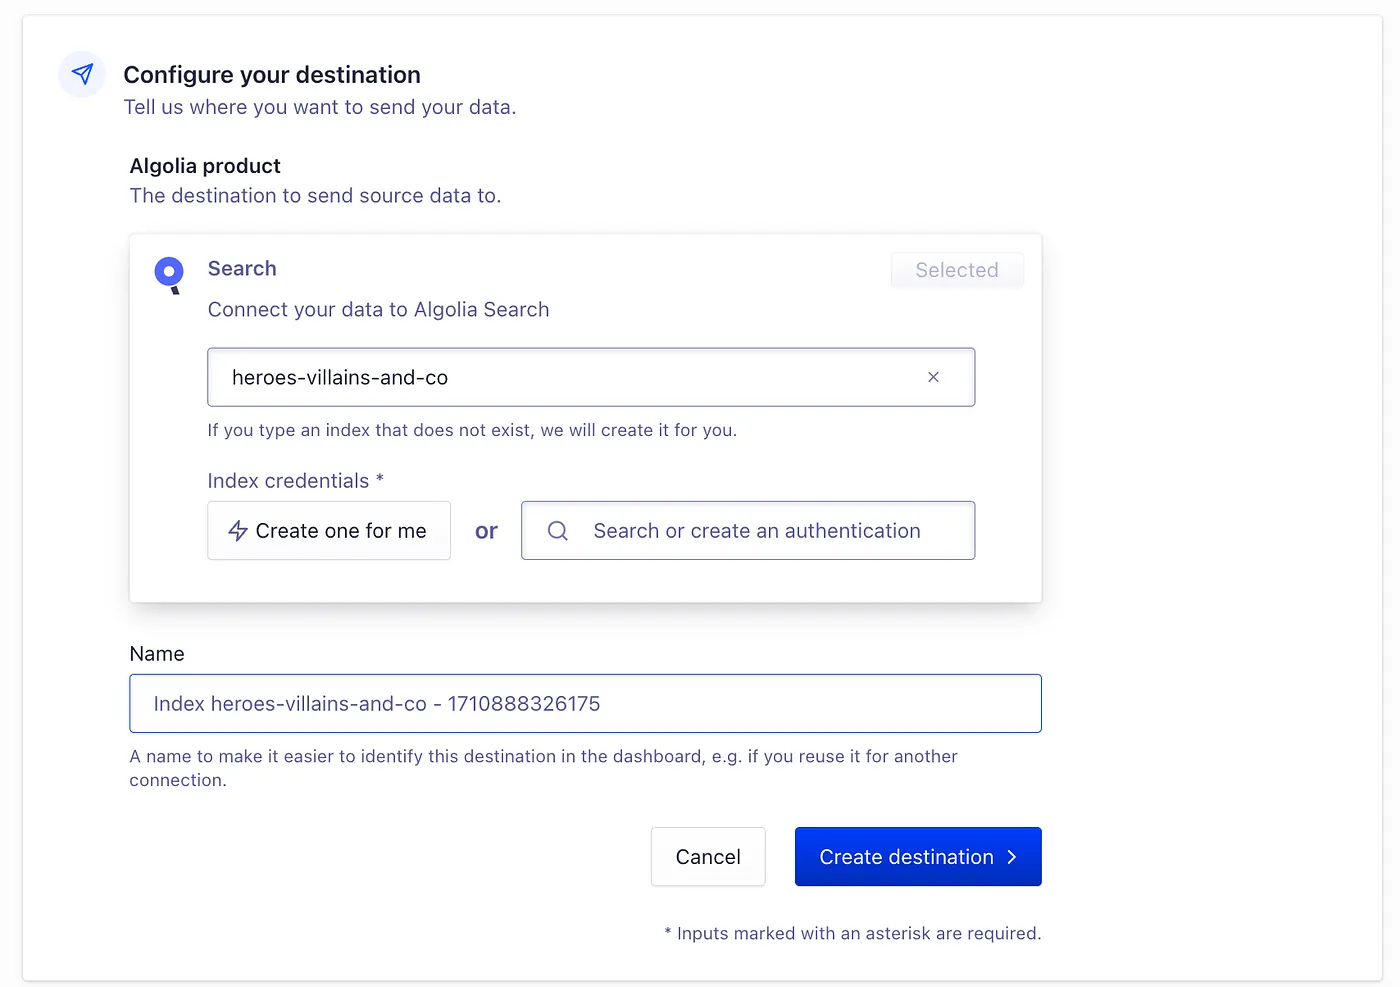
The configure field will be displayed. Leave it as it is, and click on Create destination down below.
You’ll be redirected to the tasks tab under Data Sources > Connectors. You can hit the play button at the end to start the data gathering from your app.
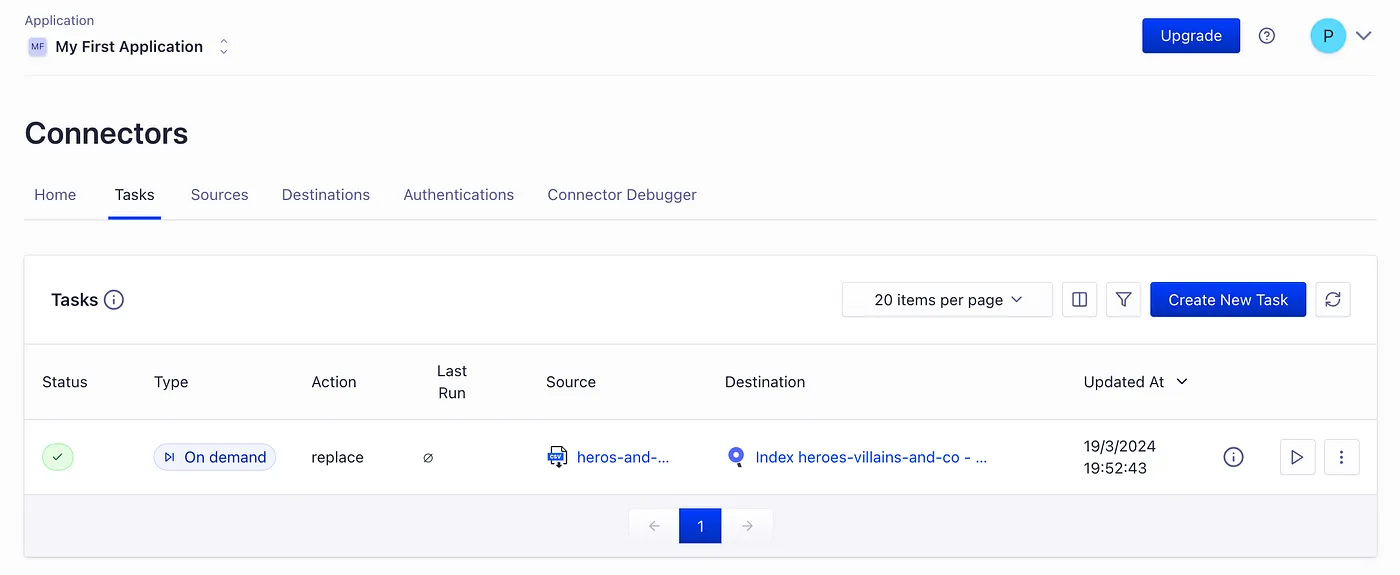
Everything should be set now! You (and I) did great!
Once the process is finished, you’ll see a green check mark ✅ in the status column.
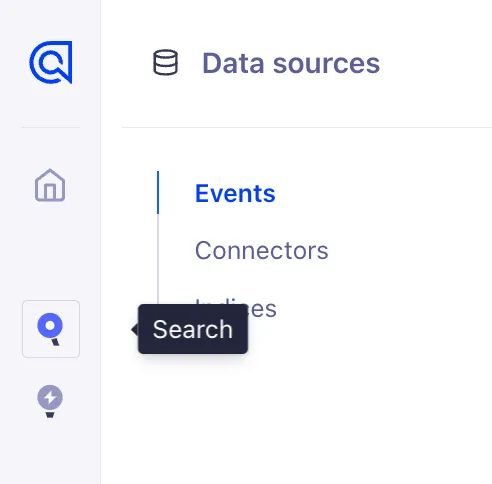
If you want to double check, go to Search (the magnifying glass icon), and your index should display all the data.
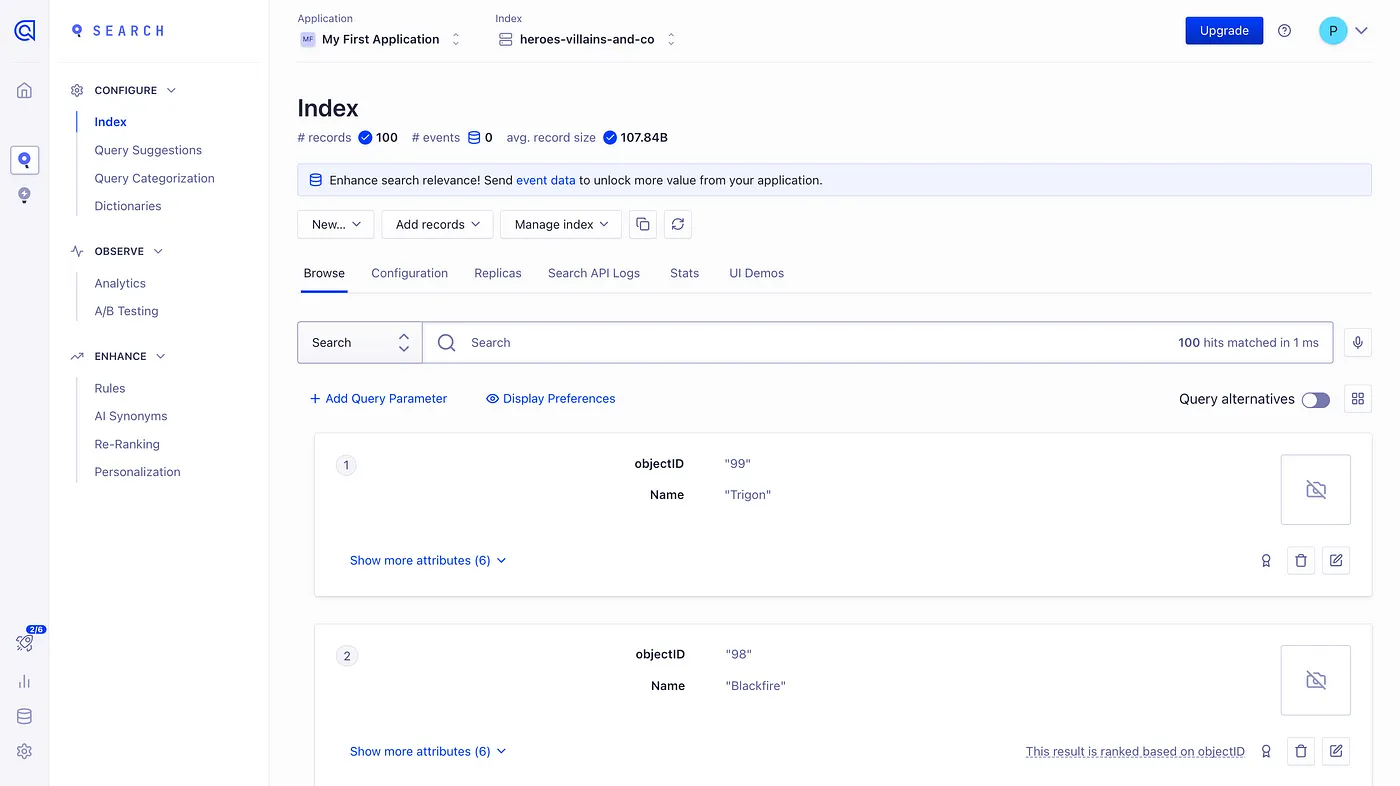
⚠️ You might encounter an empty record corresponding to the example file’s header. As seen in the image above, you can delete it directly from Algolia’s search results by clicking on the trash icon.
3. Setup InstantSearch
We’re finally here!
This is going be fun! I’m sure you’ll enjoy how easy and amazing it gets when you build search UIs with InstantSearch.
The best part is that we can keep using the same codebase we’ve been using, one of the many wonderful features of NextJS. But don’t worry if you want to use it in an old-fashioned SRP with Vite, CRA, or any other framework; you still have the freedom to do so. Even if you’re not using React, there are plenty of other options with InstantSearch that you can try, even vanilla JS!
3.1. Get your API keys
Go to your Algolia dashboard, and click on Settings. You should find API Keys right under Team and Access section.
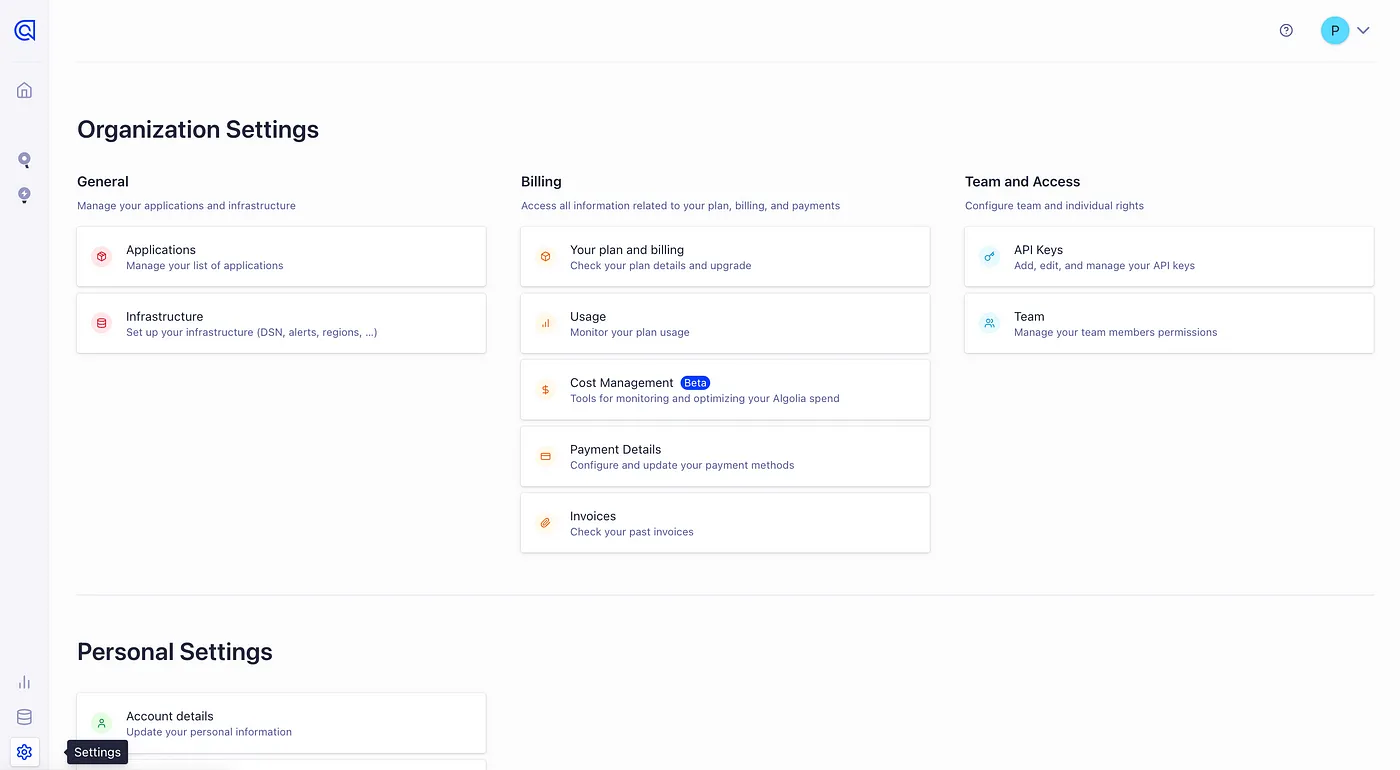
Once you click there, Application ID and Search-Only API Key headers should appear.
Make a .env file in the root of your project and create the following environment variables (copy and paste the following in your file, using your keys right next to the =):
NEXT_PUBLIC_ALGOLIA_APPLICATION_ID=ALGOLIA_APPLICATION_ID
NEXT_PUBLIC_ALGOLIA_SEARCH_ONLY_API_KEY=ALGOLIA_SEARCH_ONLY_API_KEY
✏️ “Pro” tip, create a .env.example file with the same content above. This will help other developers to know what they’re missing!⚠️ Don’t forget to put your.envfile in your.gitignorefile! Just add a line that says.env.
Now, you may be wondering, why the NEXT_PUBLIC? It's because that's how we expose environment variables to the browser in NextJS. All other environment variables that don't have that prefix will only be accessible by our server, so be careful when naming your environment variables when using NextJS!
Once you have that set, it’s time to create our first components!
3.2. InstantSearch Wrapper
Let’s complete the first steps from the installation guide.
In your terminal, run the following command to install the library:
npm install algoliasearch react-instantsearchLet’s create our first component under app/components/algolia/algolia.tsx:
"use client";
import { InstantSearch } from "react-instantsearch";
import algoliasearch from "algoliasearch/lite";

const searchClient = algoliasearch(
  process.env.NEXT_PUBLIC_ALGOLIA_APPLICATION_ID!,
  process.env.NEXT_PUBLIC_ALGOLIA_SEARCH_ONLY_API_KEY!
);

const Algolia = () => {
  return (

      Algolia

  );
};

export default Algolia;
Delete everything from app/page.tsx, and you’ll get something like this, calling the Algolia component we just created:
import Algolia from "./components/algolia/algolia";

export default function Home() {
  return (


  );
}
Notice that the Tailwind classes used also changed.
We’re all set, and ready to start adding widgets and create our own! What are widgets? Basically, they’re UI components pre-built with functionalities.
You can easily try widgets from the documentation here. They are displayed in a way you can easily interact them. Each time you hover over them, a docs option will be displayed that you can click to see all the options available with code. I recommend you go there every time you have a doubt about how to implement any piece of available UI!
3.2.1. Cleanup
Let’s do some cleanup before starting to add more code.
Before continuing, please clean your global.css file, until it looks like this:
@tailwind base;
@tailwind components;
@tailwind utilities;
That way, we’ll get rid of all undesired styles. We want to build our own stuff!
3.2.2. Define your data type
Search results are based on the file you uploaded. Ideally, everyone should know the incoming data structure, but sometimes that’s very hard to do. To prevent people from exploring the index and seeing the available properties before everything is finished, let’s create an interface for our characters’ data.
If you were following all the things we’ve been doing, and using the file provided in the repository, create the file app/contracts/characters.ts and add the following code:
export interface Character {
  name: string;
  title: string;
  vision: string;
  weapon: string;
  gender: string;
  nation: string;
  affiliation: string;
  description: string;
  constellation: string;
  rarity: number;
  card: string;
  "gacha-card": string;
  "gacha-splash": string;
  icon: string;
  "icon-big": string;
  "icon-side": string;
  portrait: string;
  "talent-burst": string;
  "talent-na": string;
  "talent-passive-0": string;
  "talent-passive-1": string;
  "talent-passive-2": string;
  "talent-skill": string;
}
This is one of the few interfaces we’ll need, if not the only one meaningful.
3.2.3. Display your hits
“Hit” is another term for your search results showcasing each item that is being listed and displayed inside your Algolia index.
Let’s do a first display of our data.
I’ll give you some indications if you wanto to explore the options, and the code at the end.
Go to your Algolia component, and “ import { Hits } from "react-instantsearch";.
Then, call the component inside <InstantSearch>.
Use the prop hitComponent, which will receive a function, being the first argument of the hit itself. Make the function return a component (or JSX, using <li>), getting data from hit (which contains a hit attribute that contains the real data).
The code should end up looking like this:
"use client";
import { Hits, InstantSearch } from "react-instantsearch";
import algoliasearch from "algoliasearch/lite";

const searchClient = algoliasearch(
  process.env.NEXT_PUBLIC_ALGOLIA_APPLICATION_ID!,
  process.env.NEXT_PUBLIC_ALGOLIA_SEARCH_ONLY_API_KEY!
);

const Algolia = () => {
  return (

       {hit.name as string}}
      />

  );
};

export default Algolia;
Go to the index page and see our results coming!
You should now have a list of character names being displayed from Algolia!
If you want, you can create a Hit component and, to have all the props from Character available, extend its props from Character:
import { Character } from "@/app/contracts/character";

interface Props extends Character {}
const Hit = ({ name }: Props) => ({name});

export default Hit;
And use it like this in your Algolia component:
This might not be used for all cases. Generally, you want to know and see exactly what is being sent and received in your component, but its cool for experimenting and saving some time. Always try to exactly the props you’ll be waiting for!
Now, a little clarification:
I will not stop styling stuff. This only covers basic usage and functionality. If you’d like to see the same things that were built, go and check the repository.
3.2.4. Adding a search bar
Having a search bar is a must if we’re creating a search UI. The showcase will help you find what we want and the documentation for it.
Let’s do a basic implementation under app/components/search-box/search-box.tsx
<Hit {...(hit as unknown as Character)} />Try typing any name you see on the screen, and see how its filtering in real time! You could also try typing using some of the attributes above, which should cause particular subset should be displayed. For example, nation or vision. You can check that all match a certain criteria by checking your network tab, filtering the results, or adding that attribute to your Hit component.
But what happens if you want to filter by one of those without typing, or selecting them from a list? You’ll need a refinement list.
3.2.5. Adding a Refinement List.
According to Algolia’s documentation, a refinement list is “[…] a widget that lets users filter the dataset using multi-select facets […] The widget also implements a search for facet values, which provides a mini search inside the facet values. This helps users find uncommon facet values”.
Again, let’s add a basic implementation in app/components/refinement-list/refinement-list.tsx.
import { useState, useRef } from "react";
import {
  useInstantSearch,
  useSearchBox,
  UseSearchBoxProps,
} from "react-instantsearch";

const SearchBox = (props: UseSearchBoxProps) => {
  const { query, refine } = useSearchBox(props);
  const { status } = useInstantSearch();
  const [inputValue, setInputValue] = useState(query);
  const inputRef = useRef(null);

  const isSearchStalled = status === "stalled";

  function setQuery(newQuery: string) {
    setInputValue(newQuery);

    refine(newQuery);
  }

  return (

       {
          event.preventDefault();
          event.stopPropagation();

          if (inputRef.current) {
            inputRef.current.blur();
          }
        }}
        onReset={(event) => {
          event.preventDefault();
          event.stopPropagation();

          setQuery("");

          if (inputRef.current) {
            inputRef.current.focus();
          }
        }}>
         {
            setQuery(event.currentTarget.value);
          }}
          autoFocus
        />
        Submit

          Reset

        Searching…


  );
};

export default SearchBox;
Remember to wrap it with your InstantSearch component. It will ask you for an attribute, which is the field you want to "filter" by. You can add as many refinement lists as you want. You might want to test it right away but there's a catch. If you've been checking the documentation, you must make the faceting attributes explicit.
Go to your dashboard, and click on the magnifying glass, on the left side of the screen. Then, in your index, go to Configuration. There, search Attributes for faceting. In the first section, add all of the options you want to facet for (e.g.: vision, nation, weapon, and affiliation for our data set). Make them all searchable by selecting the option from the dropdown, and don't forget to click on save!

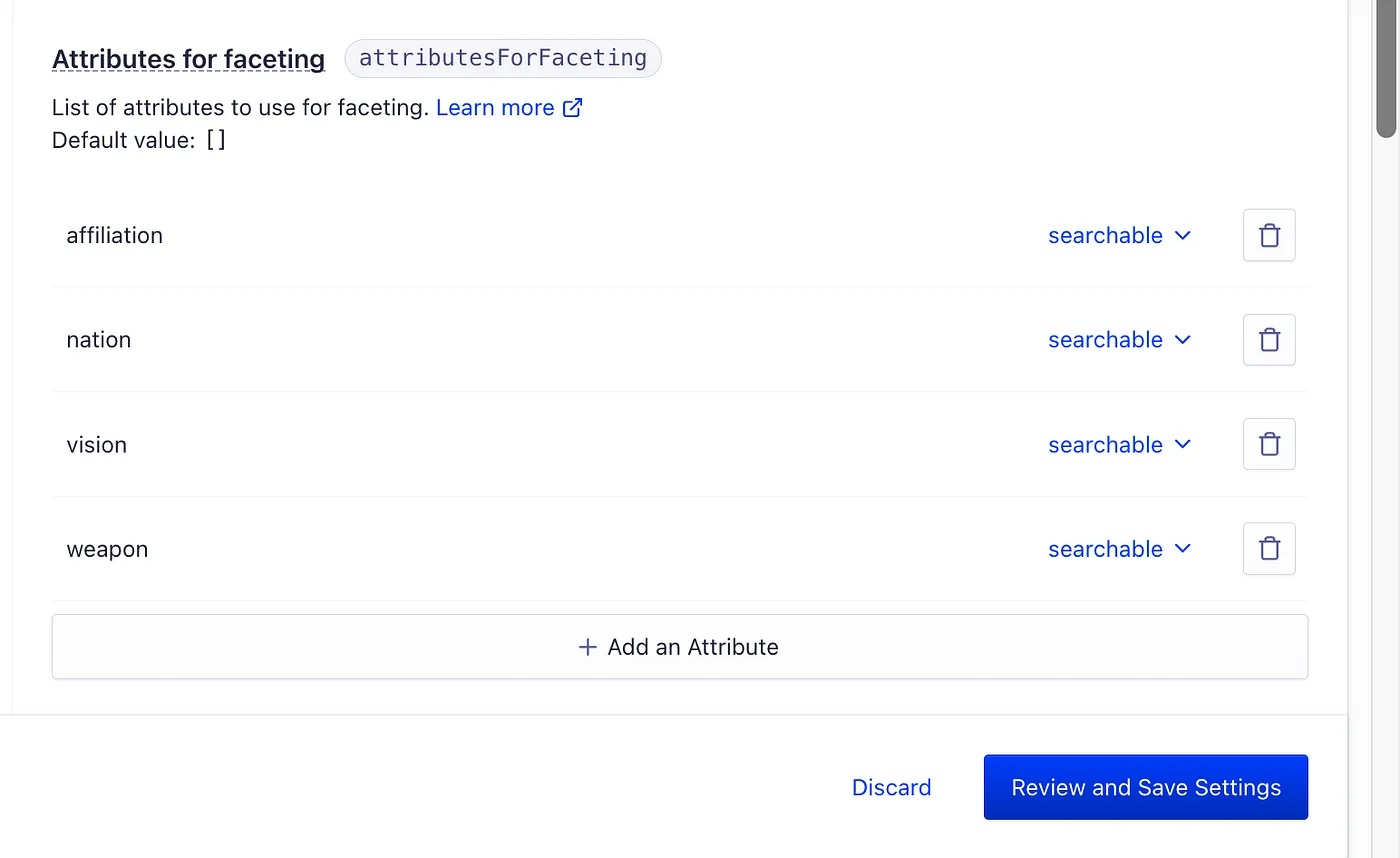
Once that’s done, your refinement lists should appear with a nice isolated search bar and checkboxes.
If you click on the check boxes, you’ll that the refinement lists also update their order to match other refinements. Isn’t that cool?
I want you to check out the hooks for a second. They will always provide useful state information, functions, and how to change them. Remember to check the documentation for every component on the widget showcase. Everything will be explained over there, and you’ll learn why refine is going to be one of your best allies.
3.2.6. Current refinements and clearing
As you move up and down, your UI moves everywhere. If you select more and more refinements, you’ll end up losing your sight.
We can place the useCurrentRefinements (docs here) hook inside a new component that will list each one of them, giving us the functionality to remove them regardless of their type; we can also use a clear refinements component to clean the UI from any filter we added.
We will use them together in one single component!
Create a file in app/components/current-refinements/current-refinements.tsx:
import React from "react";
import { useRefinementList, UseRefinementListProps } from "react-instantsearch";

const RefinementList = (props: UseRefinementListProps) => {
  const {
    items,
    refine,
    searchForItems,
    canToggleShowMore,
    isShowingMore,
    toggleShowMore,
  } = useRefinementList(props);

  return (
    <>
       searchForItems(event.currentTarget.value)}
      />

        {items.map((item) => (


               refine(item.value)}
              />
              {item.label}
               ({item.count})


        ))}


        {isShowingMore ? "Show less" : "Show more"}


  );
};

export default RefinementList;
3.2.7. Adding Pagination
Now, what can we do to see more (or less) results than the ones that should be displayed? To fix that, we can add some pagination.
Not all of the components need to be custom. We can simply import something like Pagination from react-instantsearch, and it should work like a charm. You can also try to style it a little bit, like this:
3.2.8. Hits per page
Once again, let’s not rush into creating custom components. Let’s try more of Algolia’s behavior by default, to see how powerful it is just by using its components.
Import HitsPerPage (you can check the docs here) from react-instantsearch, and inside the InstantSearch component, add the following:
Remember that all of the components we’ve been adding will display as any HTML. This component will appear in the exact same position as you placed it.
If you’d like to customize the component to use, for example, a Listbox from Headlessui, always look at the bottom of the page for custom implementations like the ones we already made above, but don’t worry. As it is right now, changing the values should work!
If you pay close attention, you’ll see the pagination will change according to the items per page you’ve selected.
3.2.9. Sorting
We already have a UI full of connected amazing tools. But, we might want to see our results in a specific order. We’re not going to create a new component; rather, we’ll use the pre-defined one, but we do need to do some setup to use sorting.
Replicas “ are copies of your primary, seamlessly synchronized.” You also have virtual replicas, which are “a view of your index synchronized and used for Relevant sorting only.”
We’re going use a Standard replica.
Go to your index and access the replica tab. Hit on “Create Replica Index” and type the name of your replica. A common way to do it is ${index_name}_${sortby_attribute_name}_${sort_direction}. For this case, let's use characters_rarity_asc and characters_rarity_desc.
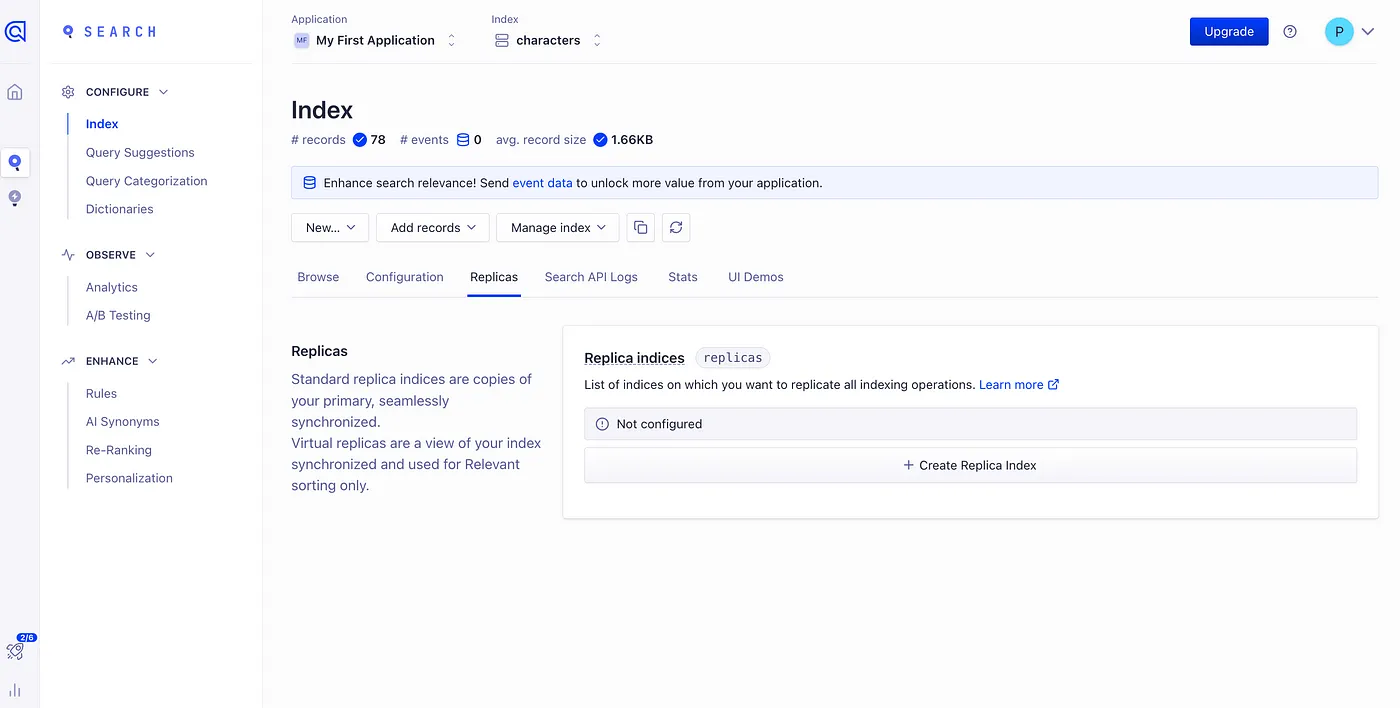
Remember to save your changes.
This will create new indexes.
There is one more step: Accessing the indexes, going to their Configuration tab, and under Ranking and Sorting, select the corresponding sort value. You’ll see if it should sort by ascending or descending.
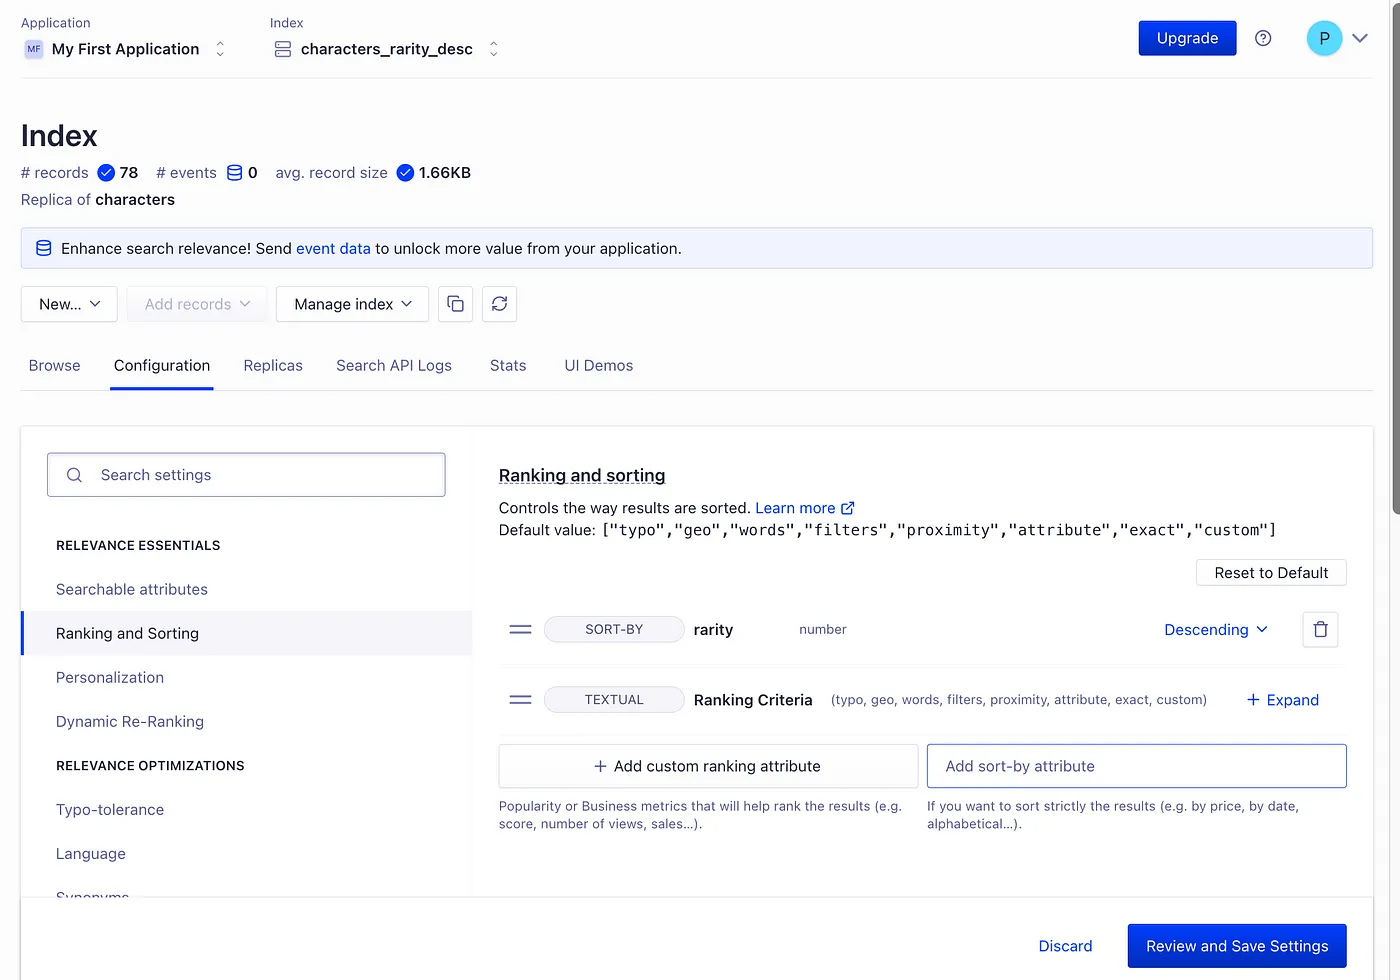
Don’t forget to save your changes, and to do the same for the next replica.
Once those setups steps are done, you can add the SortBy component like this:
Play around a little bit with it. See for yourself how it changes the order of all the characters depending on rarity!
4. On Styling
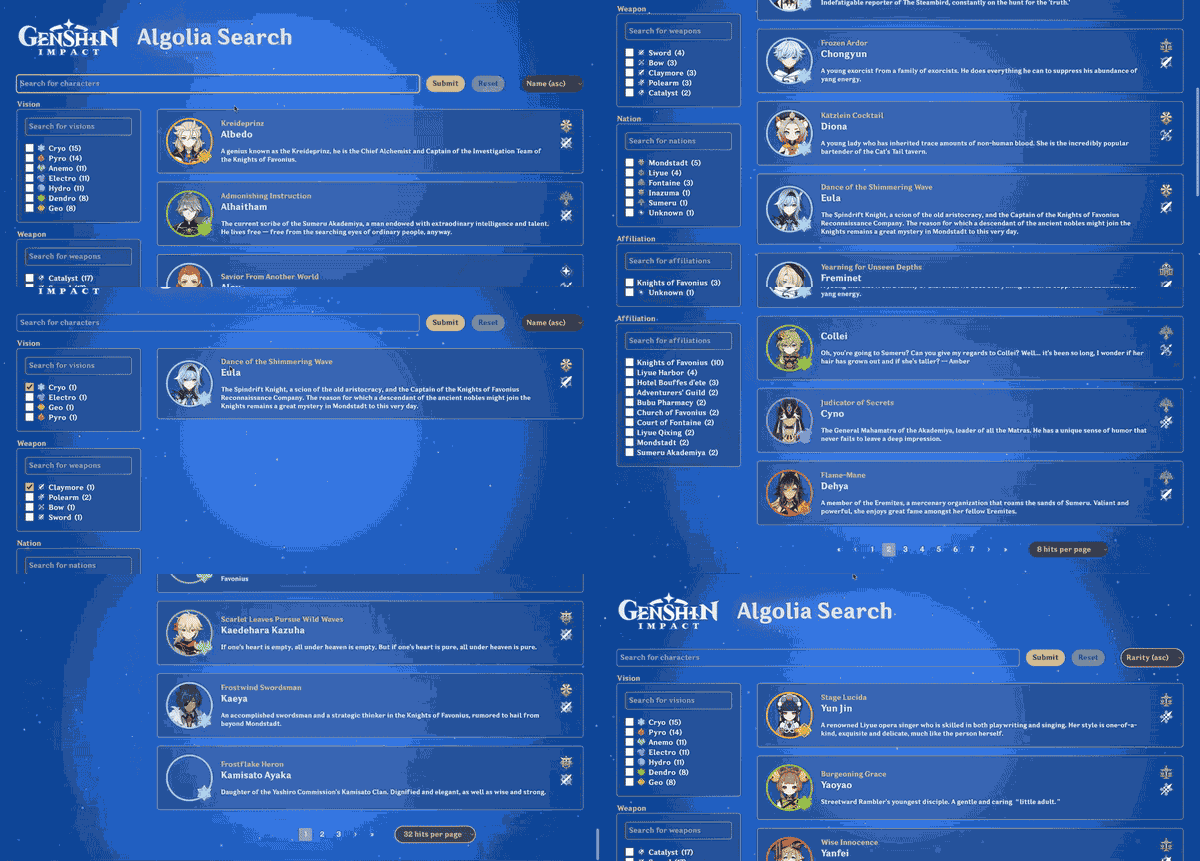
As previously said earlier in this article, styling will not be part of this guide. Nonetheless, the repository associated to it will have two branches, main, only with the code you've seen here, and styled, showing the following result:
5. Testing your app (in the cloud)
After all your hard work, you want to see all of these implemented, right? And probably running, too. The cool part is that we’ve been using the same repository all this time. Every time you push something to your repo when you access the same URL from the setup, it will refresh with all your changes. They might seem incomplete, because you still need to add your env vars to your Vercel project.
Check Vercel’s official guide and try it yourself; you’ll notice that it’s as easy as copying and pasting the necessary information.
References
The code here is based on some of the following links.
A special thanks to the authors and all the people involved in answering questions!
- (Blog post) How to stream files from Next.js Route Handlers by Eric Burel
- (Stack Overflow) How do I add Basic Authentication to Nextjs node server?
- (Github Issue) Using the new App Route Handlers
- (Stack Overflow) How to change color , background and height of the particle background in react-tsparticles?
Also, here are some links from all of those gathering and hosting the assets used for the final version under the styled branch:


