Ever wondered how to easily set-up authentication with Next.js?
One of my favorite libraries for handling problem is next-auth, a library created to handle many authorization providers. It facilitates single sign-on with services like Google, Discord, and GitHub.
Let me show you a simple way to authenticate using GitHub with just a few steps.
Set Up the GitHub OAuth App
Open your browser, and go to GitHub’s Register a new OAuth Application form.
For now, feel free to add some placeholder information, but make sure to set your callback URL to:
http://localhost:3000/api/auth/callback/github
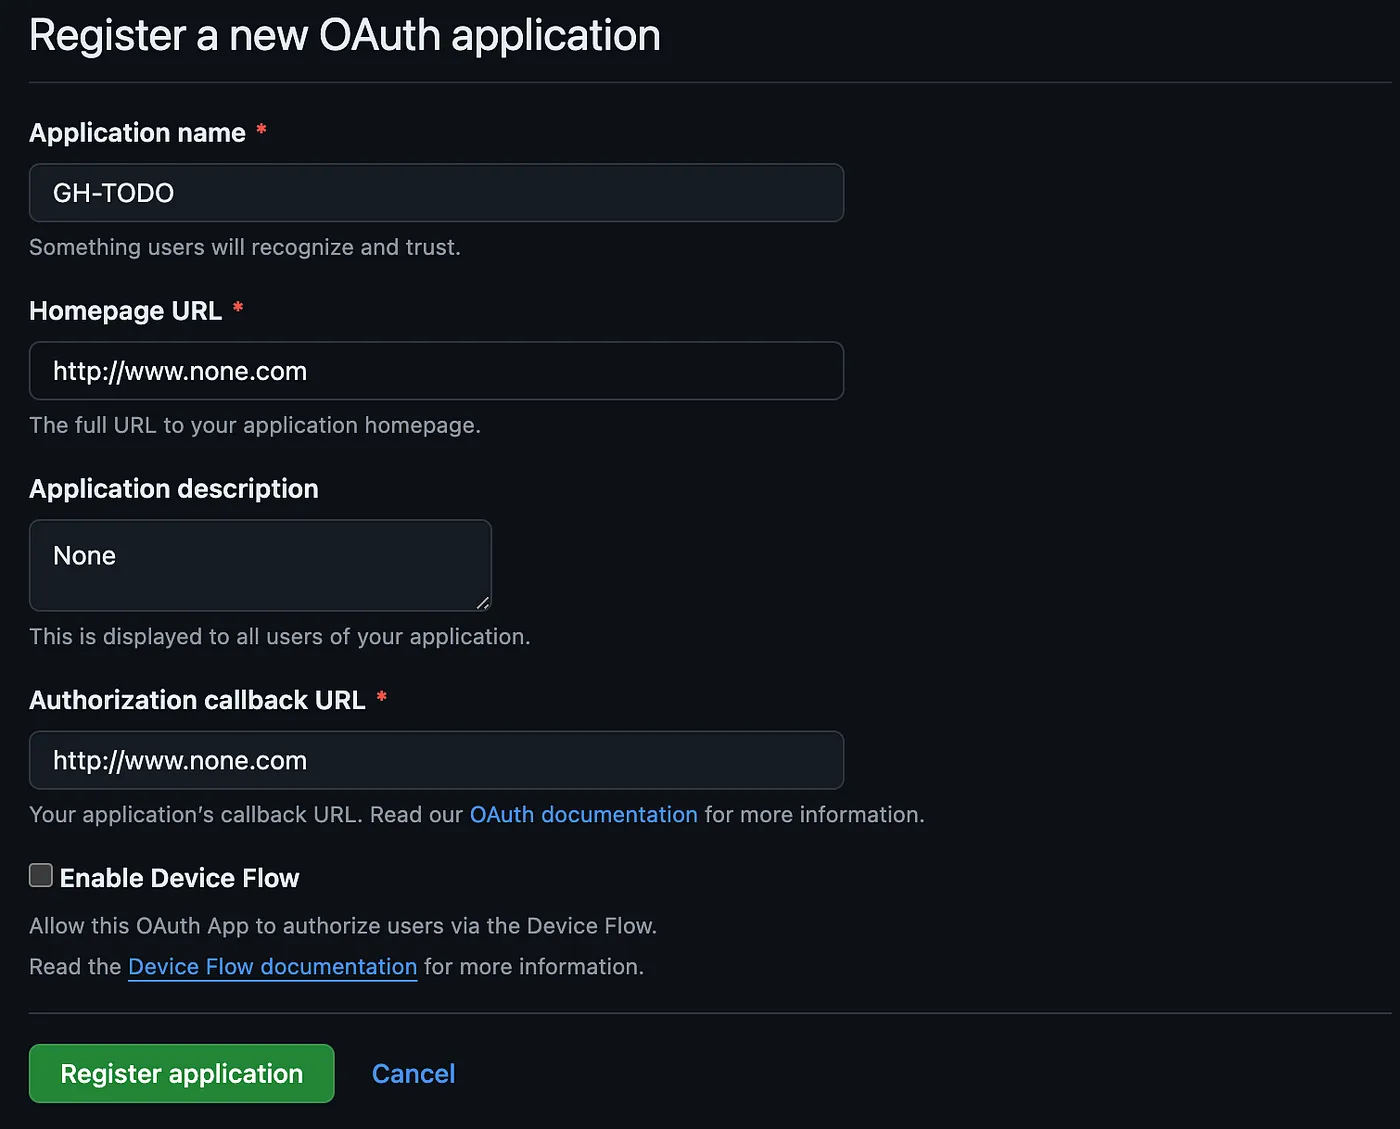
Then click on Register application, and your brand new app will be created!
Generating your client secret
You’ll be redirected to the app settings page. Once there, click on Generate a new client secret and wait until it displays below to copy it.
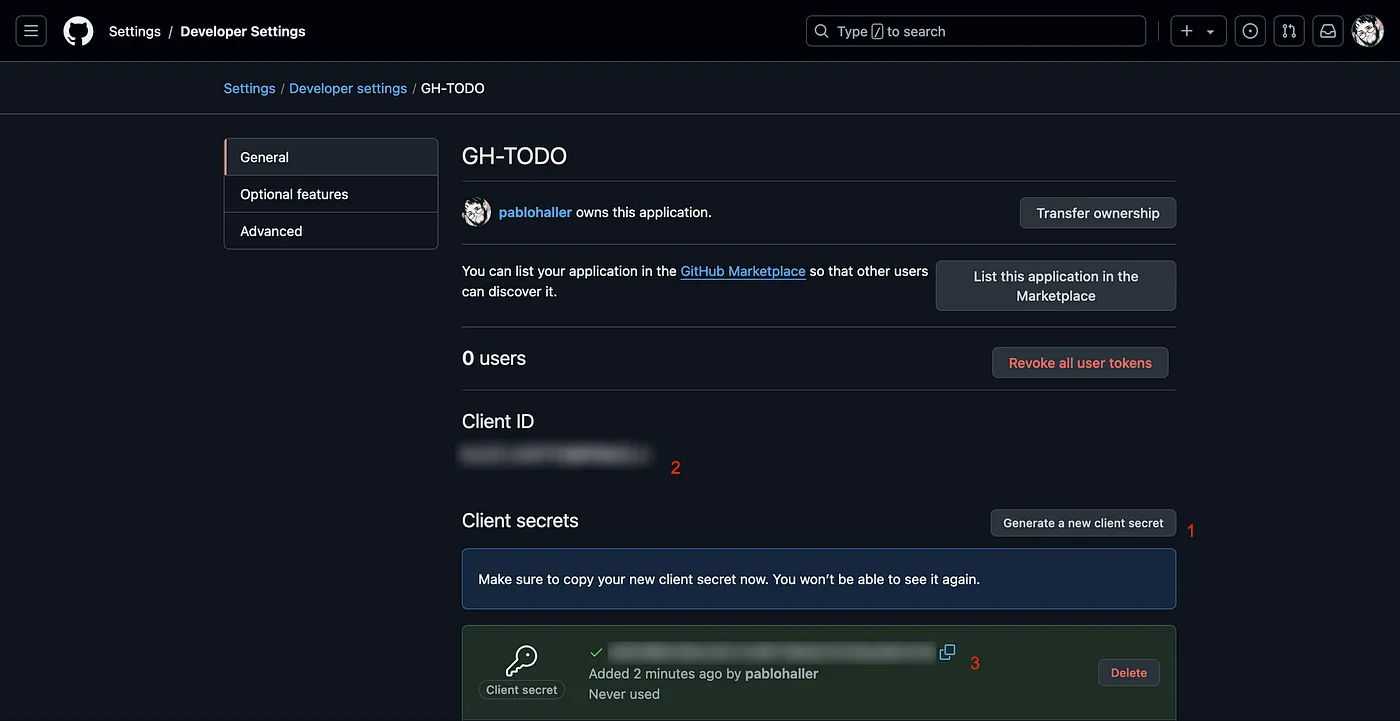
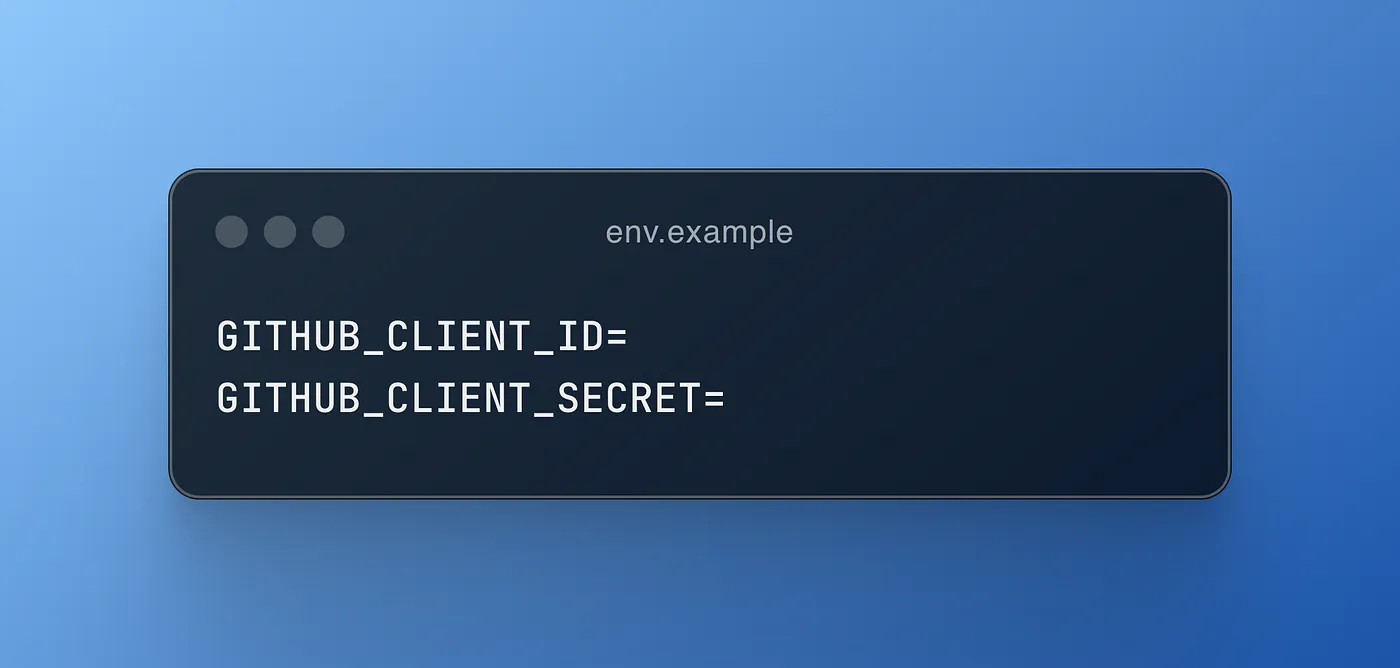
Once you’ve copied it, paste it into an .env file in the root of your application, alongside the Client ID.
Remember to create an .env.example for your future self to know what environment variables you need, or for anyone who wants modify your code. This will let them know what they need ahead of time.
Also, make sure to add the .env file to your .gitignore file. This will ensure that you won’t expose sensitive information or keys.
You’ll end up having something like this:
Adding next-auth
Run npm i next-auth to install the library.
Then, since we’re using the app router, we'll also need to use route handlers for the config. Create the following route:
![Screenshot of a terminal window showing the command npm i next-auth being run to install the next-auth library. Below that, a code editor displays the creation of a route handler in the file path /app/api/auth/[...nextauth]/route.ts. The code initializes NextAuth with configuration options, including GitHub authentication using clientId and clientSecret from the environment variables.](https://cdn.prod.website-files.com/67bdd1e95fb6860bb2166248/67d9ae0868b18220b427ee9e_670eb1f3b75f51ceba817fd9_1*C2YtzeNk96xZeQt1BrojrA.webp)
What does this do?
It generates our auth options, an object that declares which providers we’re using (e.g.: GitHub, Google, Twitch; you can find the full list here). As you can see, we need to specify the clientId and clientSecret, which we previously stored in our .env file.
We will also need to create a secret, and store it in our environment variables. This will be used to encrypt your JSON Web Token: an encoded field with useful information used for authentication and authorization purposes.
For the session property, we specify the jwt strategy and set the maxAge for the token. This is the maximum amount of time the application will allow us to be logged in before ending our session. I recommend setting this to 60 to help us see how next-auth automatically signs us out once the session expires. Feel free to change this according to your needs!
Protecting our routes
The whole purpose of authentication is protecting our resources, in this case, our routes.
Let’s create a middleware, a function that handles pre-processing for all routes.
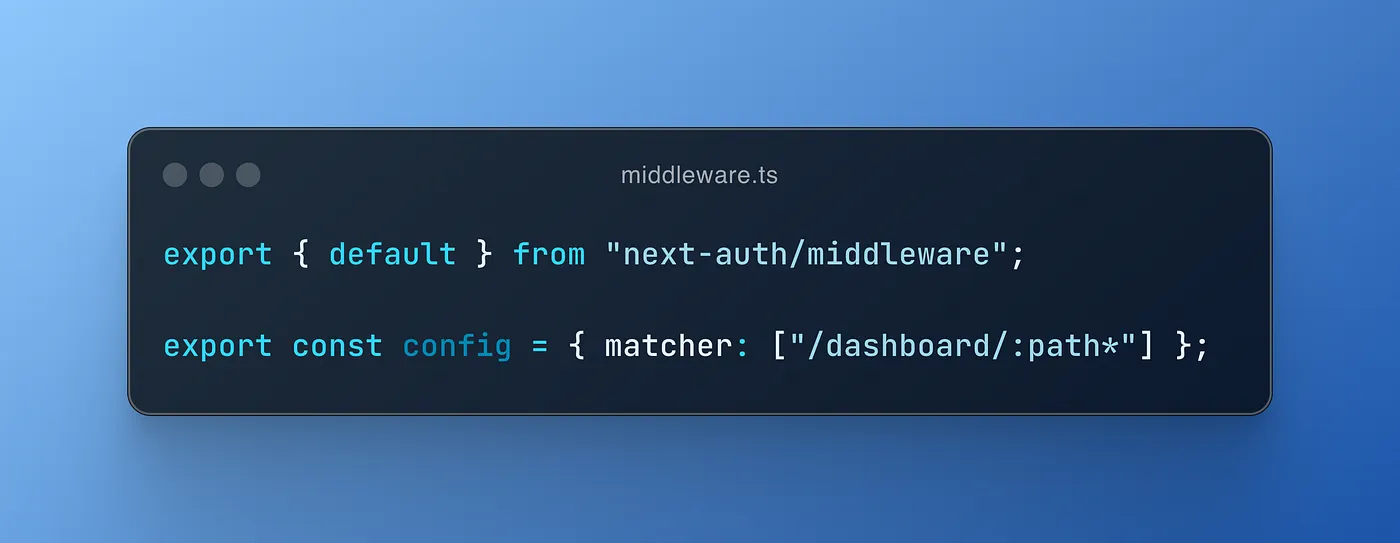
The above example is one of the basic ways to do it, though there are many others.
We run the next-auth middleware (next-auth/middleware) in the Next.js middleware (middleware.ts file). Through the config object and its matcher property, we tell exactly which routes to run it.
You can read a brief explanation of how Next.js middleware works here, and here to learn how next-auth one works.
Creating the route
We’re almost there!
Let’s create a page for our dashboard.
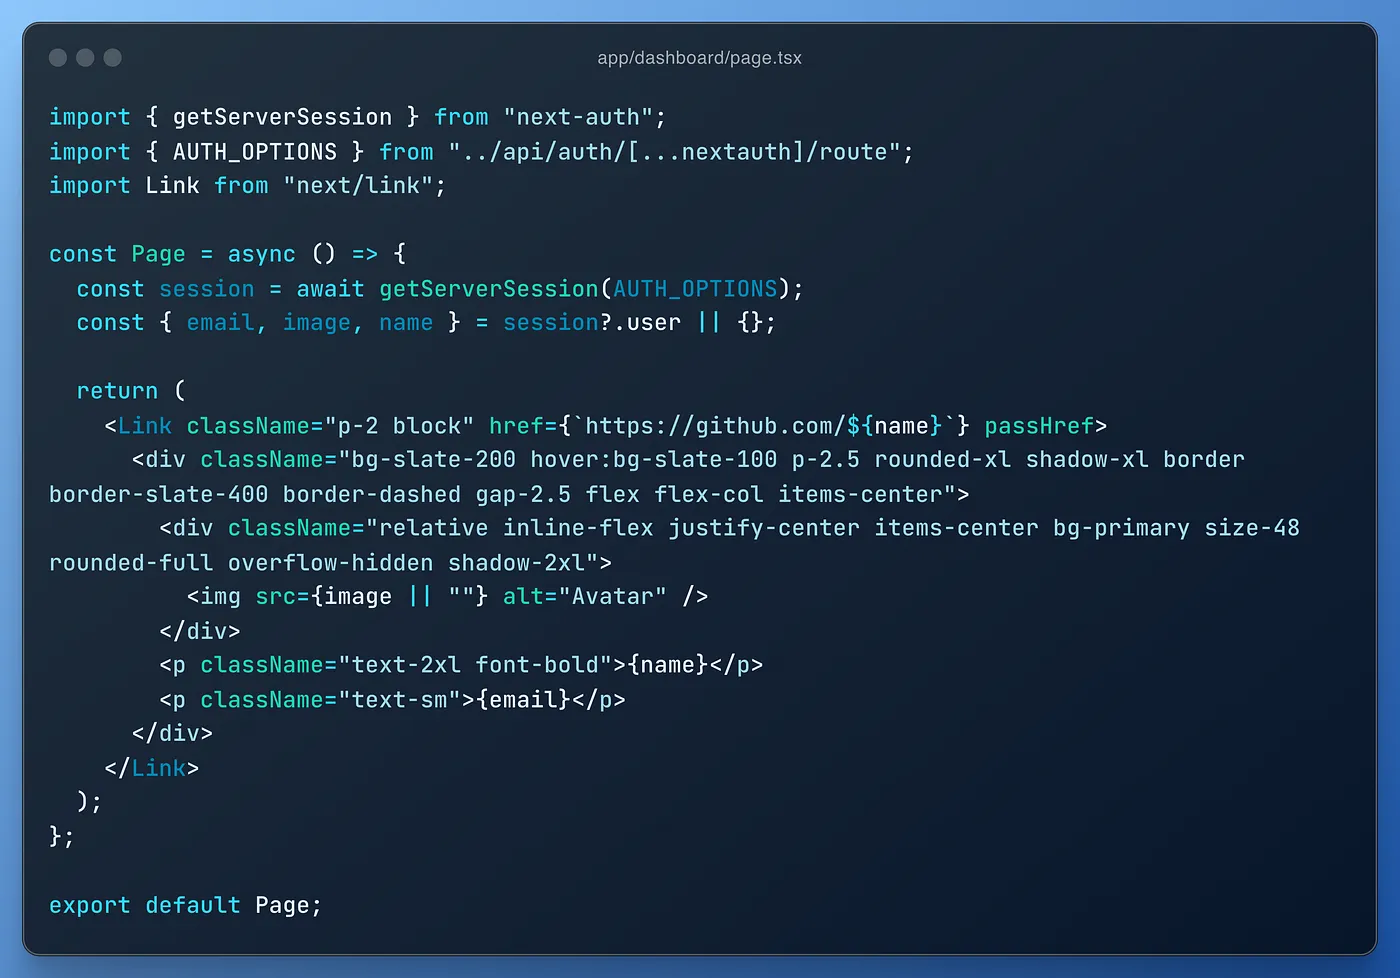
As you can see, it’s a typical Next.js page, using getServerSession to print our session information on the page. Nothing more, nothing less. It will also provide us with our GitHub user name, e-mail, and profile picture URL for later use as basic information.
Testing GitHub OAuth Authentication
Now, we can finally test our authentication process. After you run the project, try accessing /dashboard.
You will be prompted with the following screen, provided by next-auth itself:
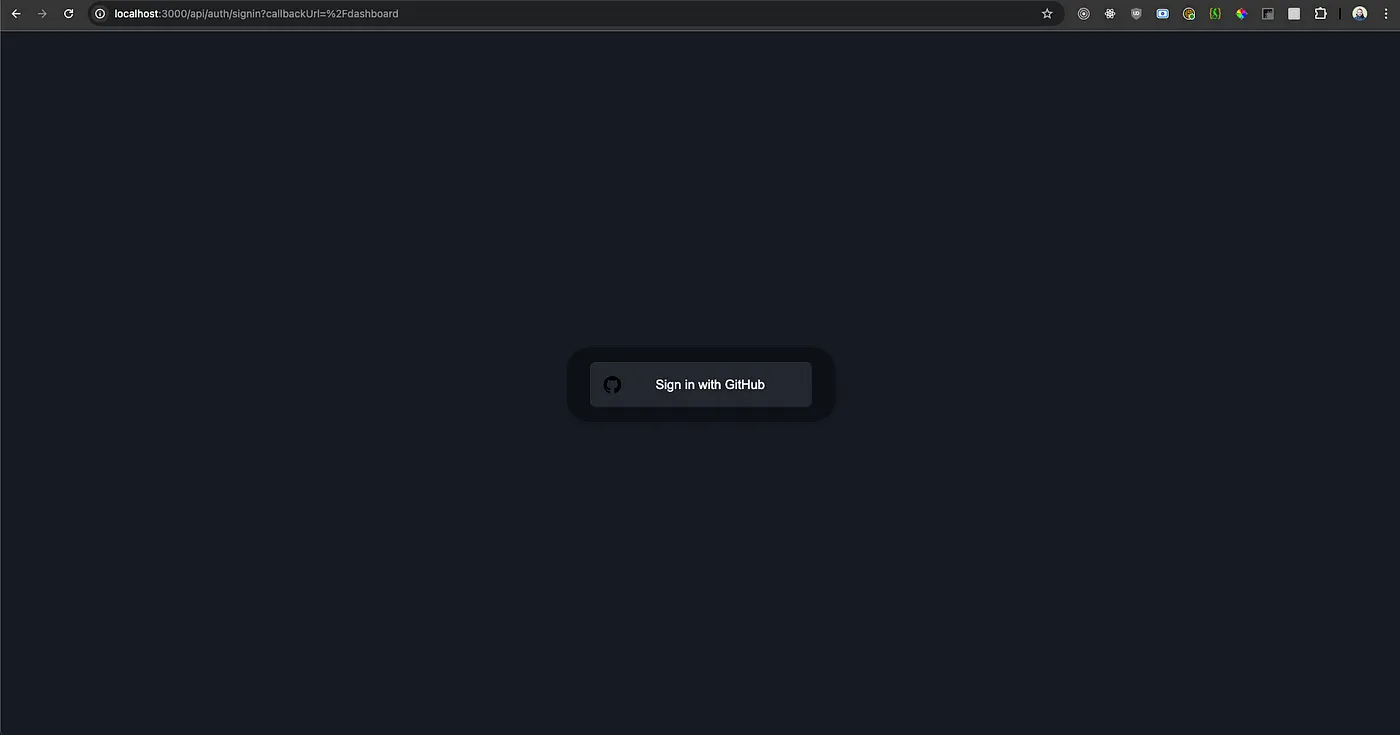
Once you click on it, you will be asked to grant permission from your GitHub account.
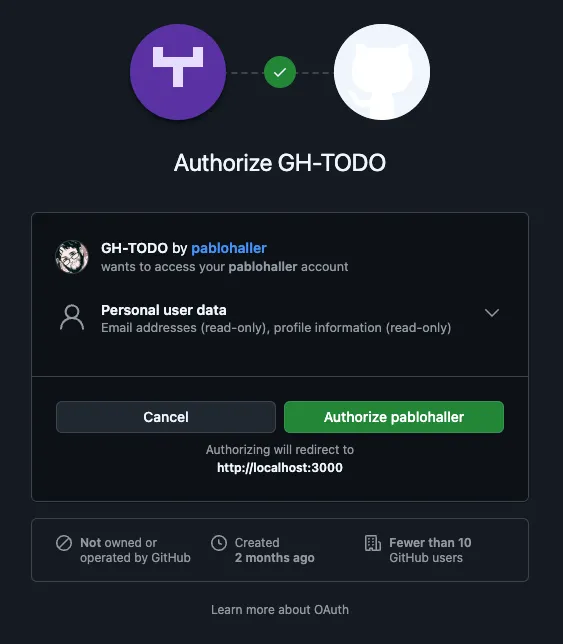
Once you authorize it, you’ll be redirected and finally see our information!

If you wait long enough (a minute), the application will log you out, returning you to the same log-in screen as before.
A great question to ask here is, how can I sign out without having to wait for the token to expire?
Simply calling signOut from a client component is good enough, which is detailed here.
Conclusion
next-auth simplifies the process of implementing authentication in Next.js applications, making it easier to integrate with popular OAuth providers like GitHub. With just a few steps, you can set up secure authentication, protect routes, and manage sessions effortlessly.
If you would like to check out the code used for this blog post, you can find it here.


